Import website / webpage
Written By Stanislas
Last updated 16 days ago
Overview
The website and webpage import feature lets you add external web content directly to your knowledge base. Swiftask crawls the content, converts it into searchable chunks, and indexes it for fast AI retrieval.
You can import two types of web content:
Website: Extracts content across multiple pages by discovering and following internal links automatically.
Webpage: Extracts content from specific URLs, with options for child sub-URLs, pagination, or bulk CSV batch import.
Once imported, the data source becomes available across Chat, AI Agents, and Projects.
Understanding the difference
Website import:
Scans and imports multiple pages from an entire domain or subpath
Automatically discovers links and calculates total page volume
Best for product documentation sites, blogs, and knowledge hubs
Webpage import:
Fetches content strictly from designated page URLs or CSV lists
Faster and focused on exact reference pages
Best for standalone articles, individual policies, and specific guides
Prerequisites
Before importing web content, make sure you have:
An active Swiftask account
Access to the Knowledge section
Permission to create data sources in your workspace
The public URL of the website or webpage you want to import
Step-by-step guide
1. Navigate to Knowledge
In the left navigation sidebar, click Knowledge.
2. Open the import menu
Click the Import button in the top-right toolbar to open the source options menu.
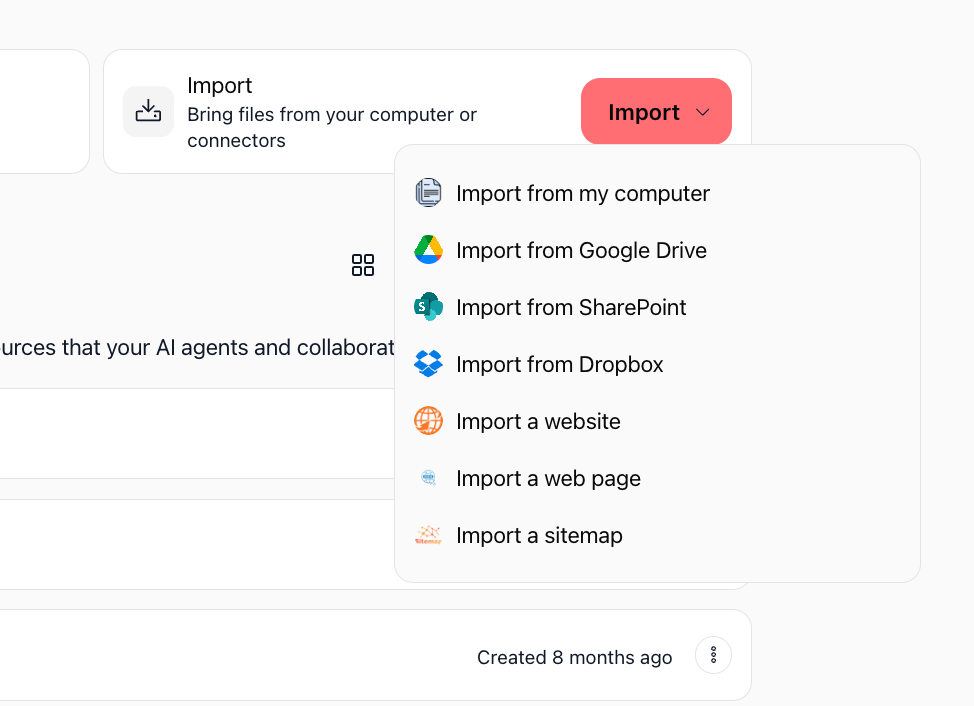
Select Import a website or Import a web page depending on your objective.
Importing a website
1. Enter website URL and details
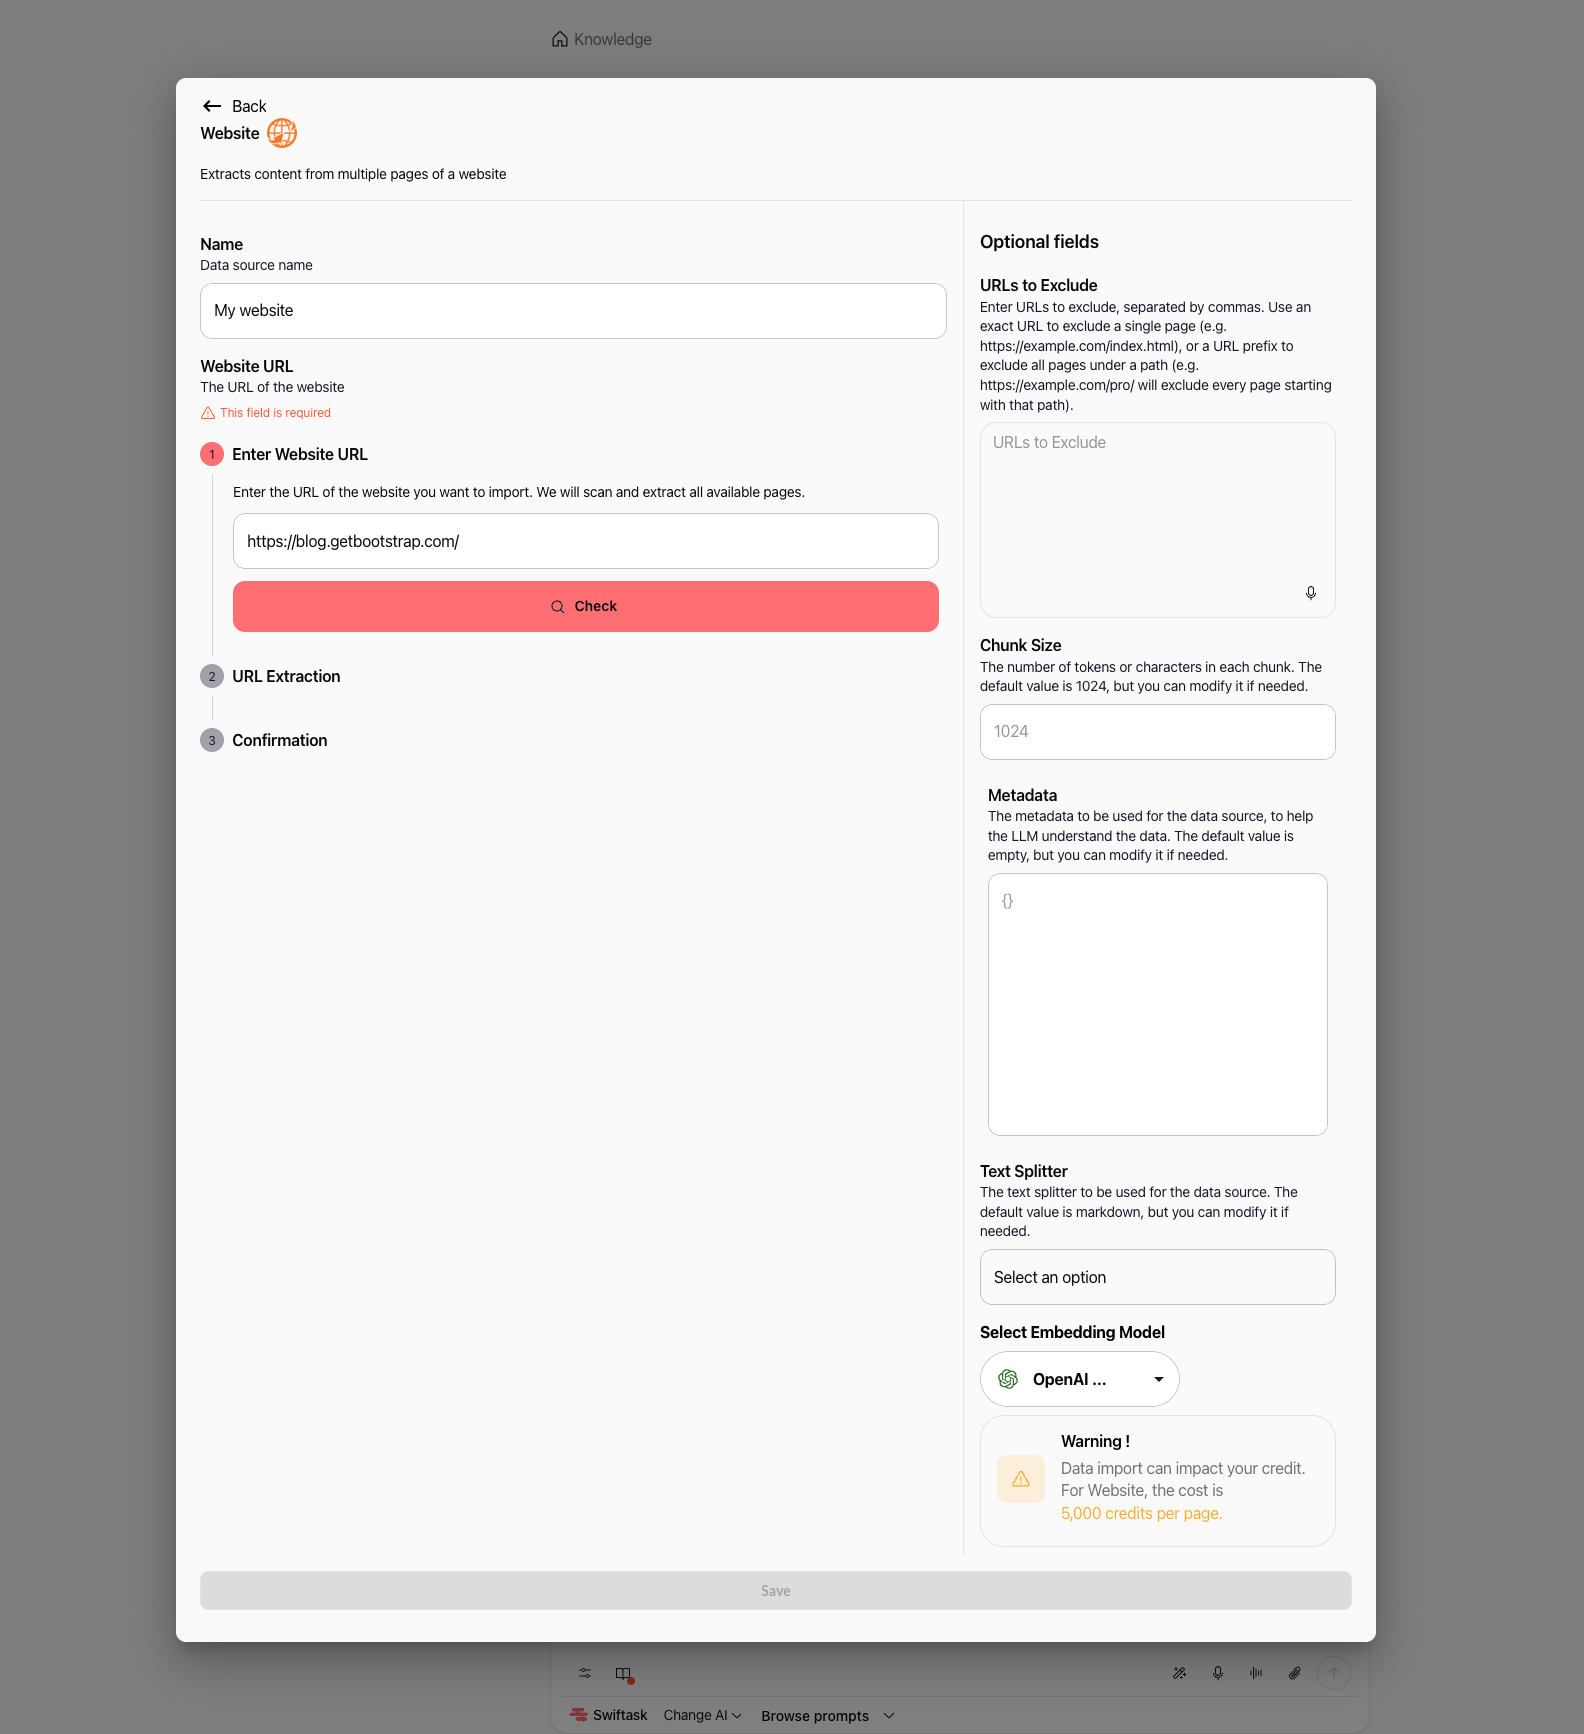
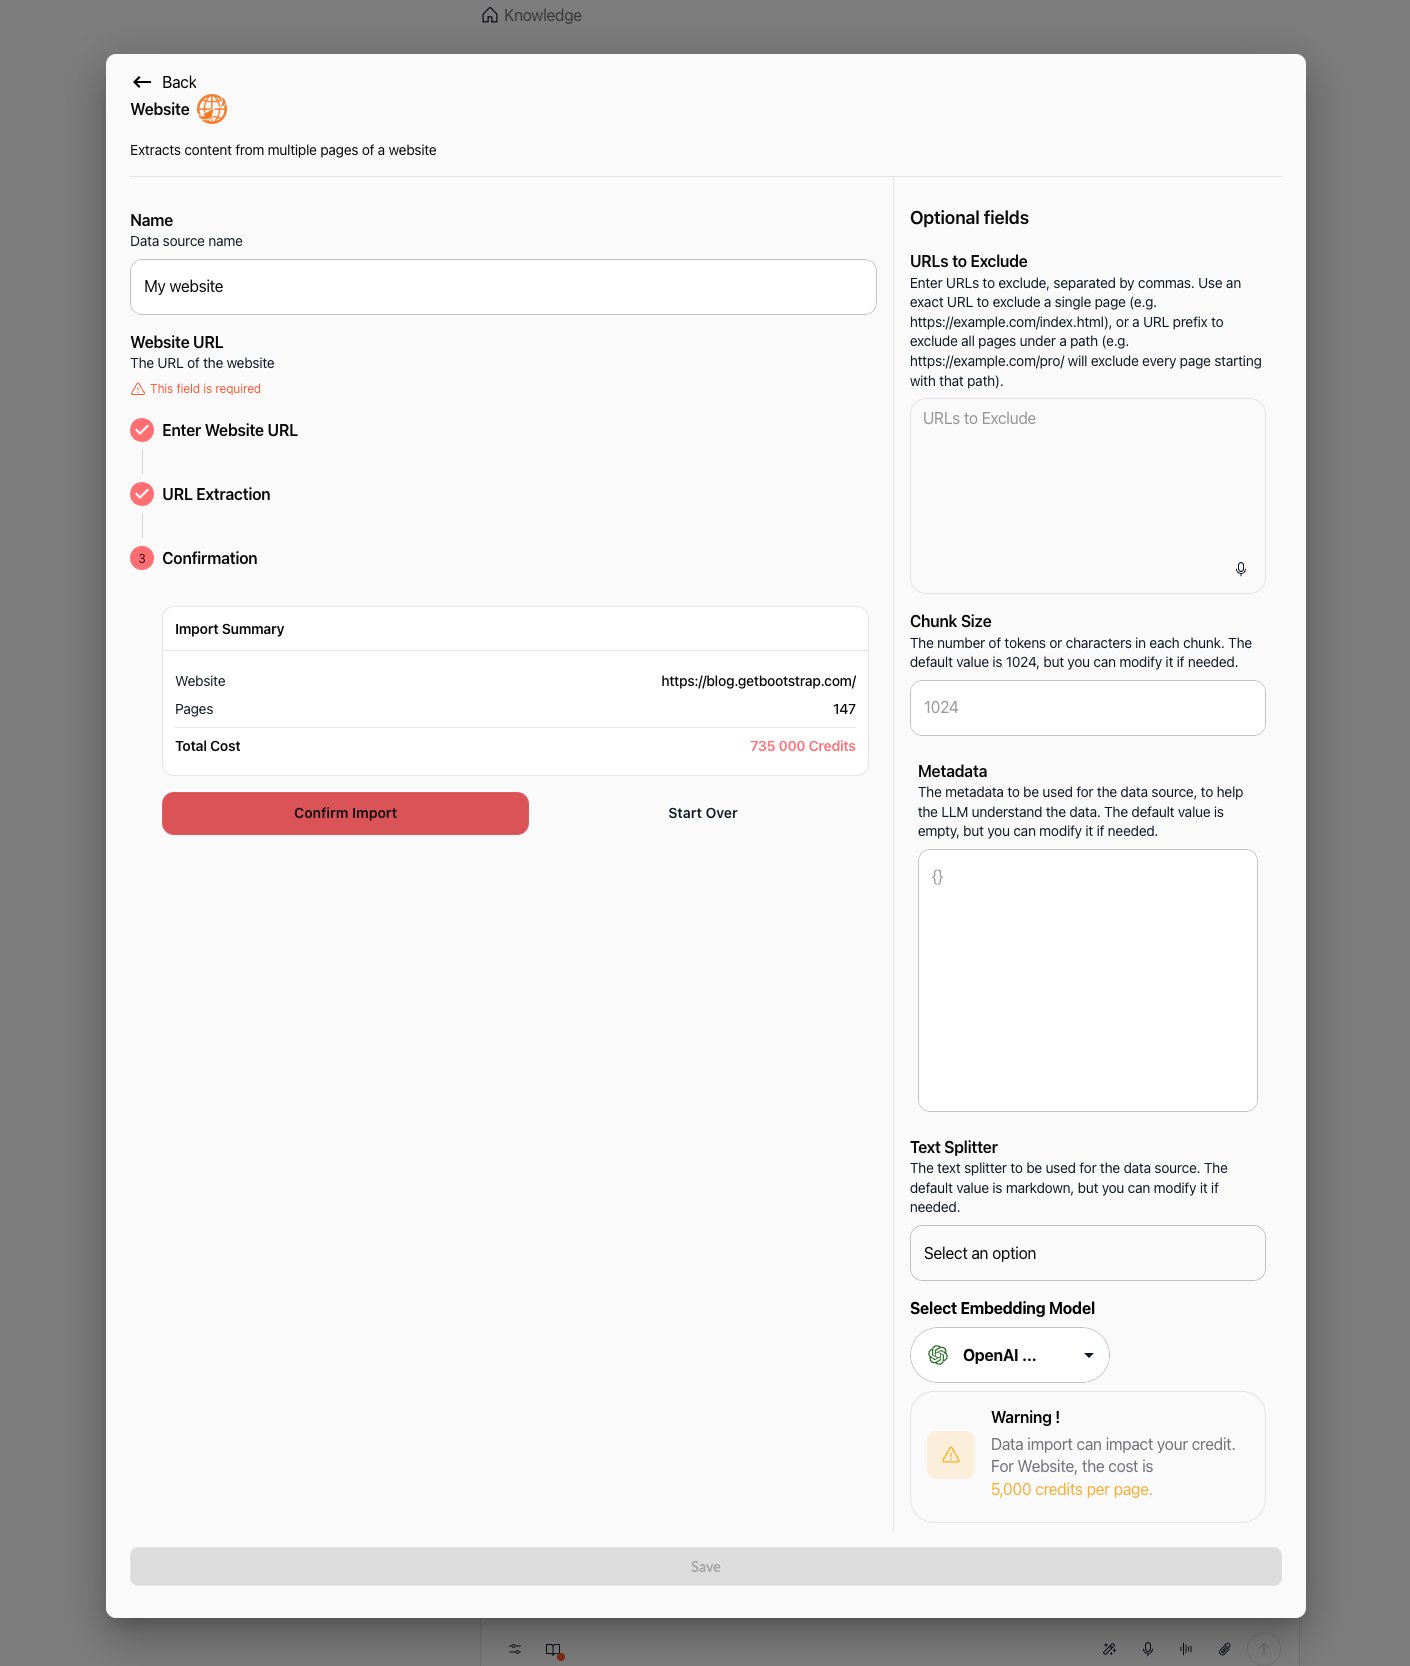
In the Name field, provide a descriptive label for your data source (e.g., "My website"). Under step 1 Enter Website URL, enter the full web address with its protocol (e.g., https://blog.getbootstrap.com/), then click Check.
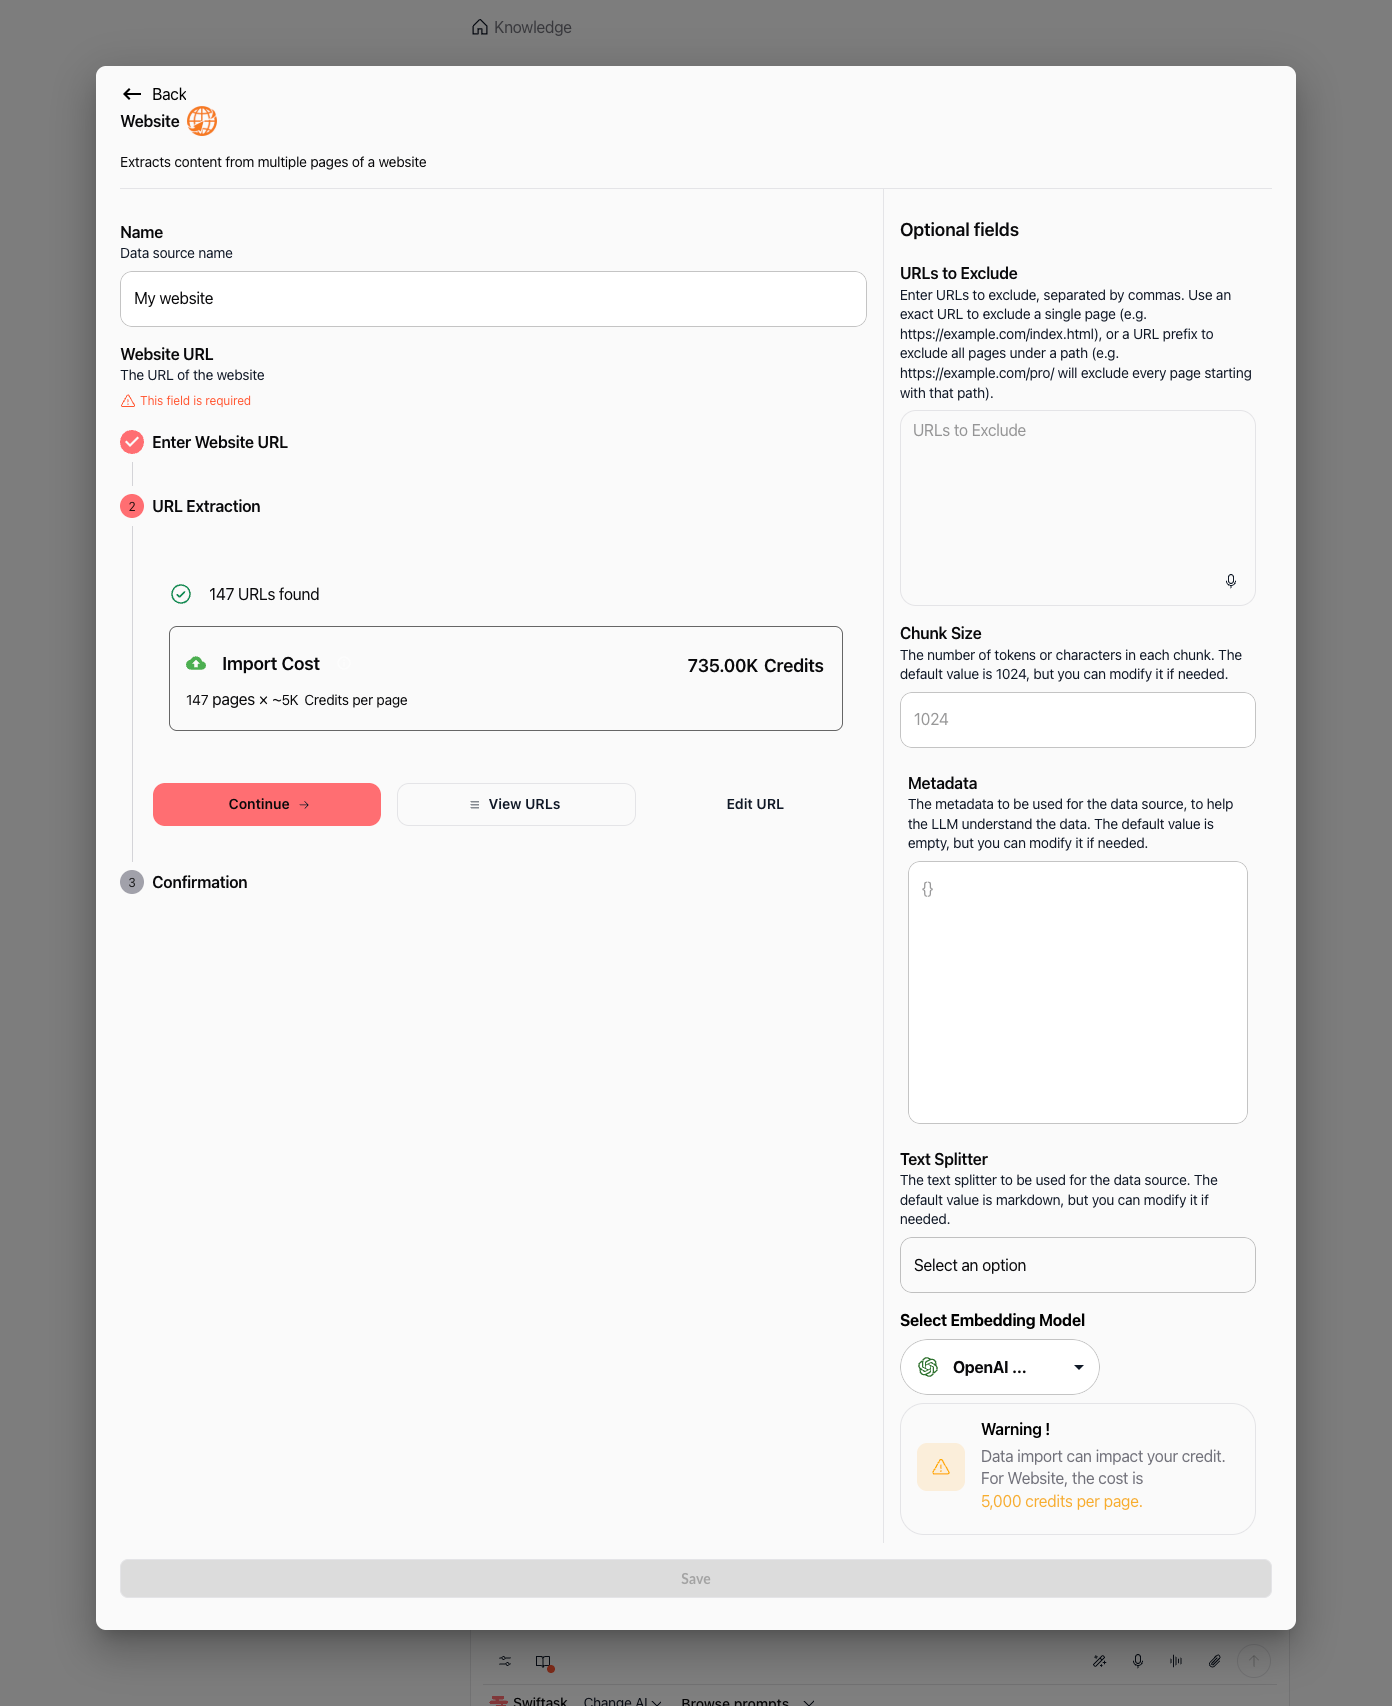
2. Review extracted URLs and import cost
Swiftask scans the site and displays the number of discovered pages alongside the estimated credit requirement (e.g., "147 URLs found" and "735.00K Credits" calculated at 5,000 credits per page).
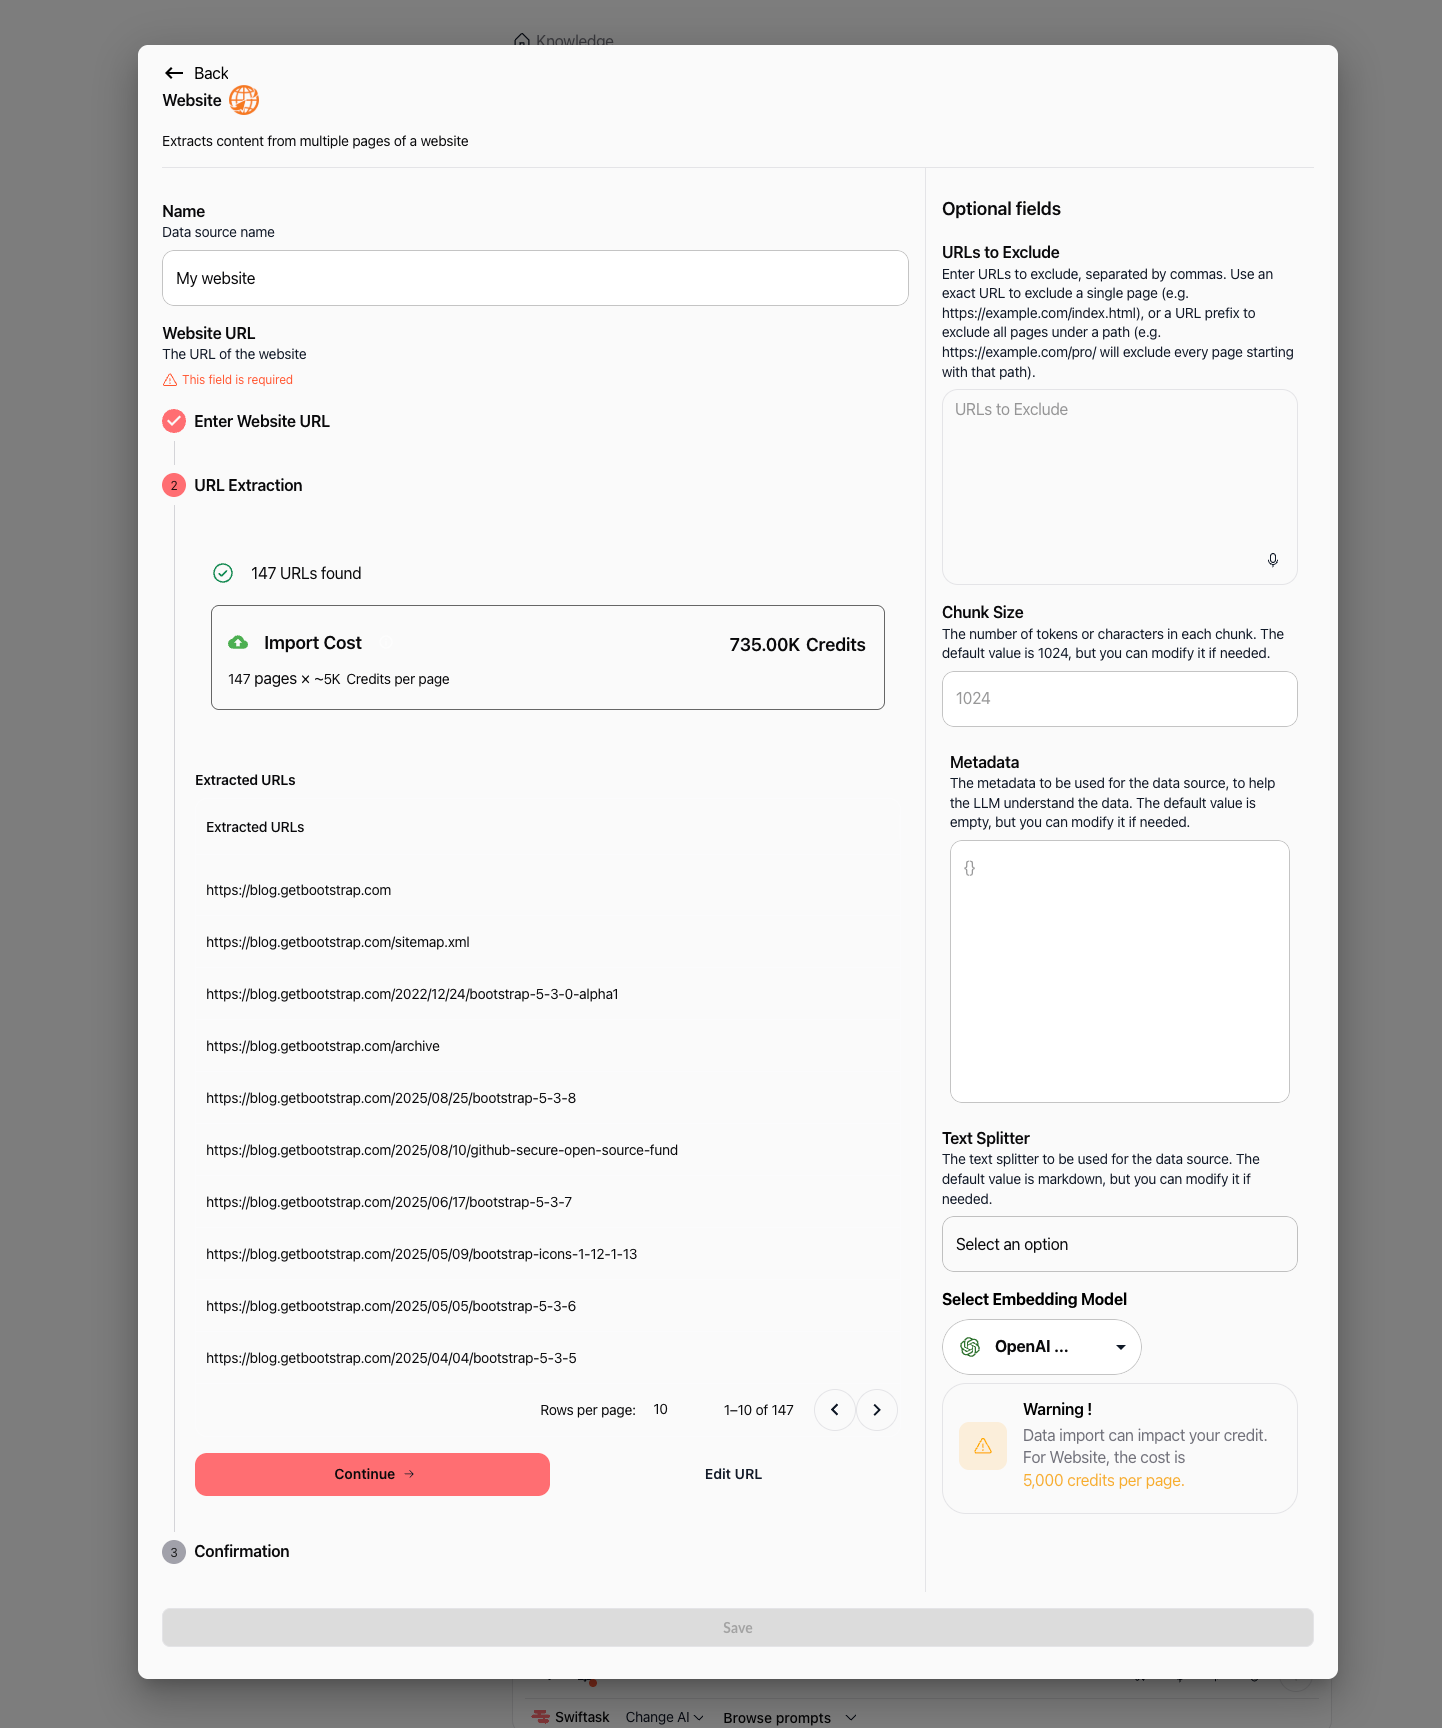
Click View URLs to inspect the table of discovered page links and verify pagination before continuing.
3. Configure optional settings
In the right-hand panel, adjust optional parameters if needed:
URLs to Exclude: Enter specific URLs or URL prefixes separated by commas to omit unwanted pages.
Chunk Size: Define the character or token size per chunk (default is 1024).
Metadata: Add custom JSON tags to provide extra context for AI retrieval.
Text Splitter: Choose the text separation strategy (default is markdown).
Select Embedding Model: Pick the vector model (default is OpenAI).
Click Continue → when your configuration is ready.
4. Confirm the import and save
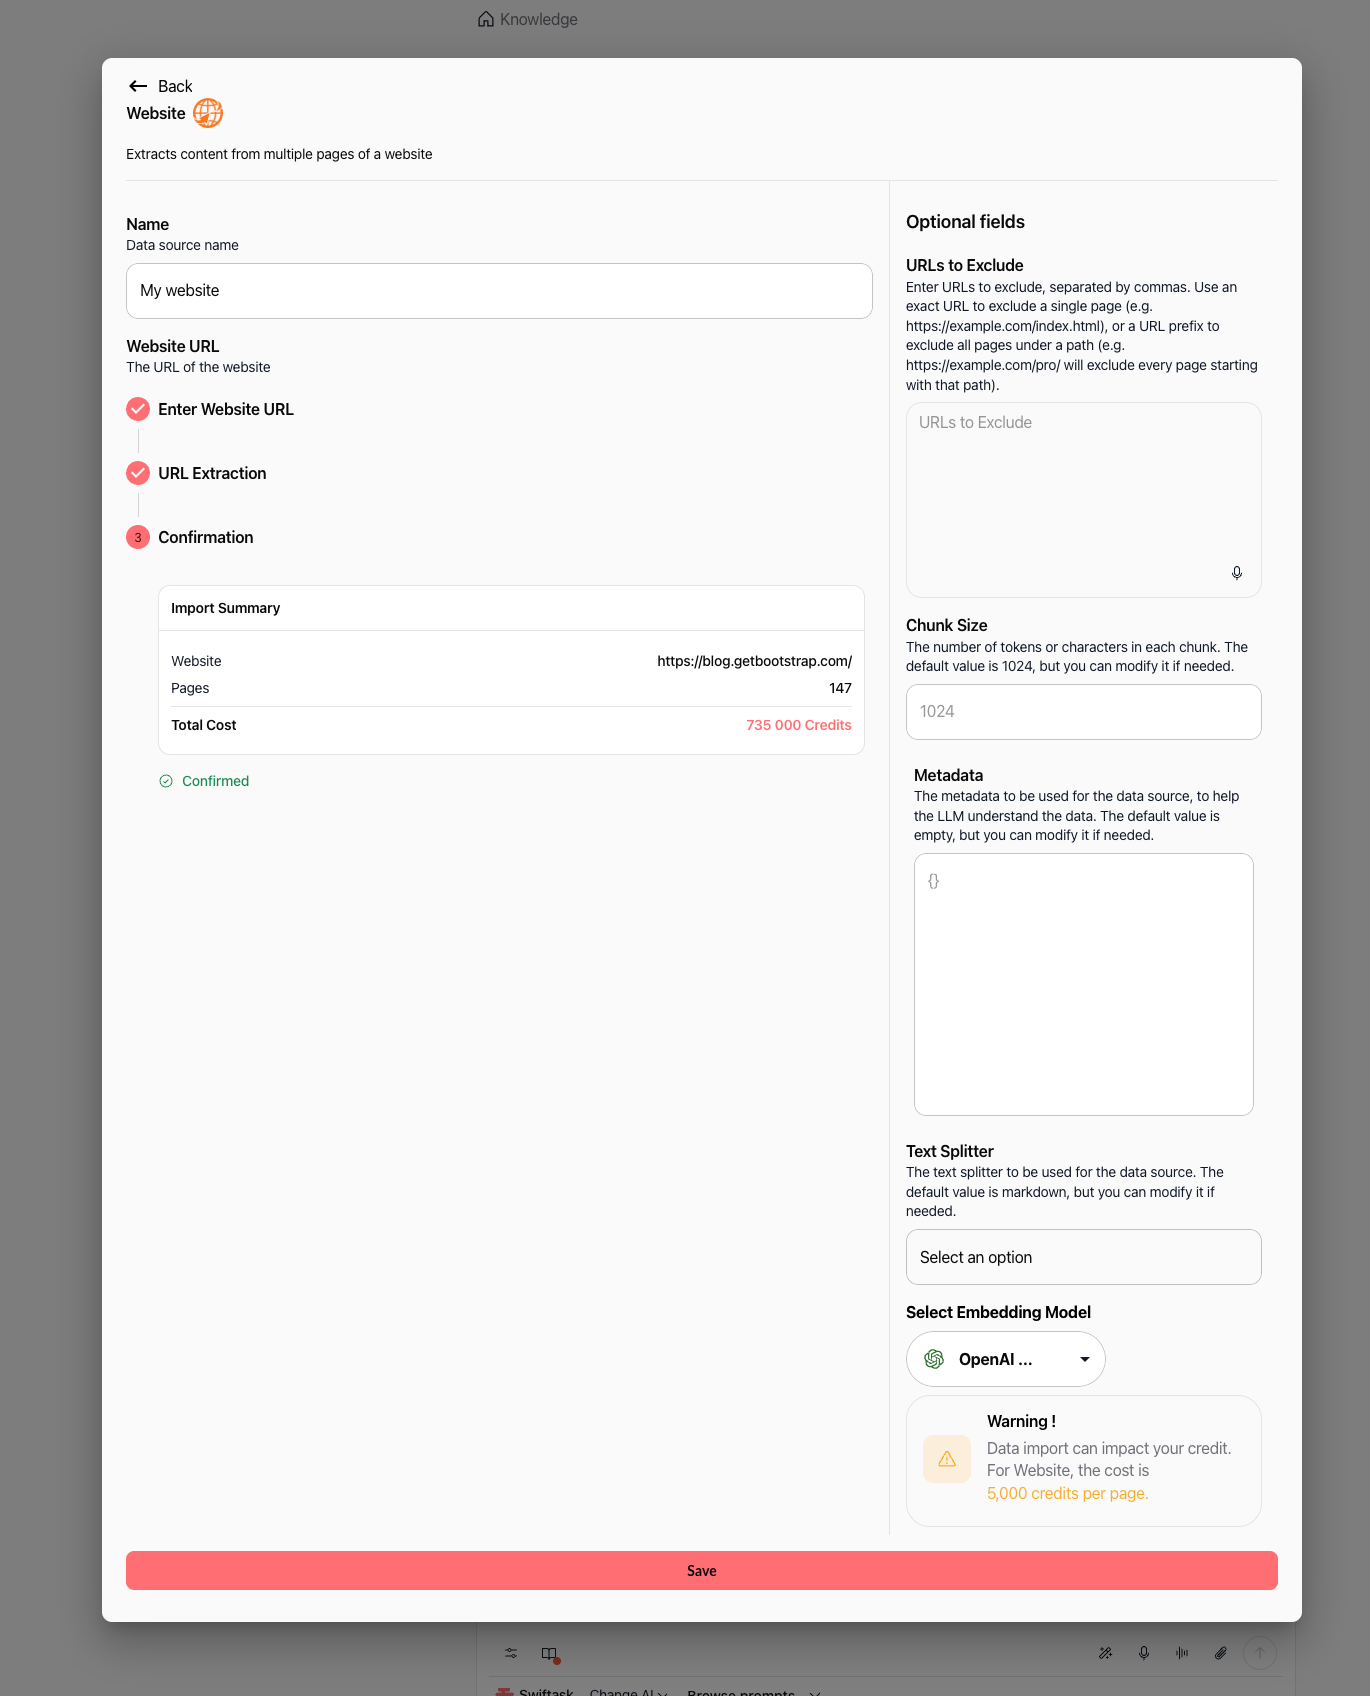
Review the Import Summary detailing the website URL, total pages, and credit cost. Click Confirm Import.
Once confirmed, the summary displays Confirmed with a green checkmark. Click the Save button at the bottom to start processing.
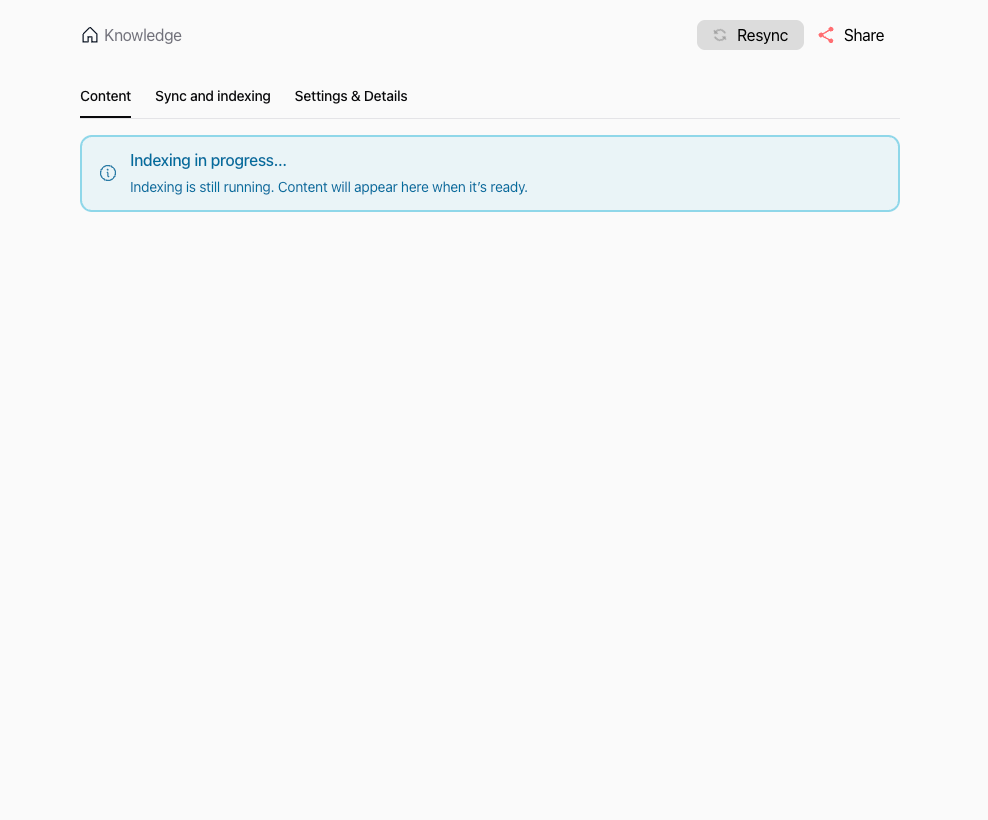
5. Track indexing status
Swiftask processes the pages in the background. While the vector database indexes your content, an alert banner displays Indexing in progress….
6. Browse imported content and preview chunks
Open the Content tab to view the list of indexed page URLs, filter them by name, or verify pagination.
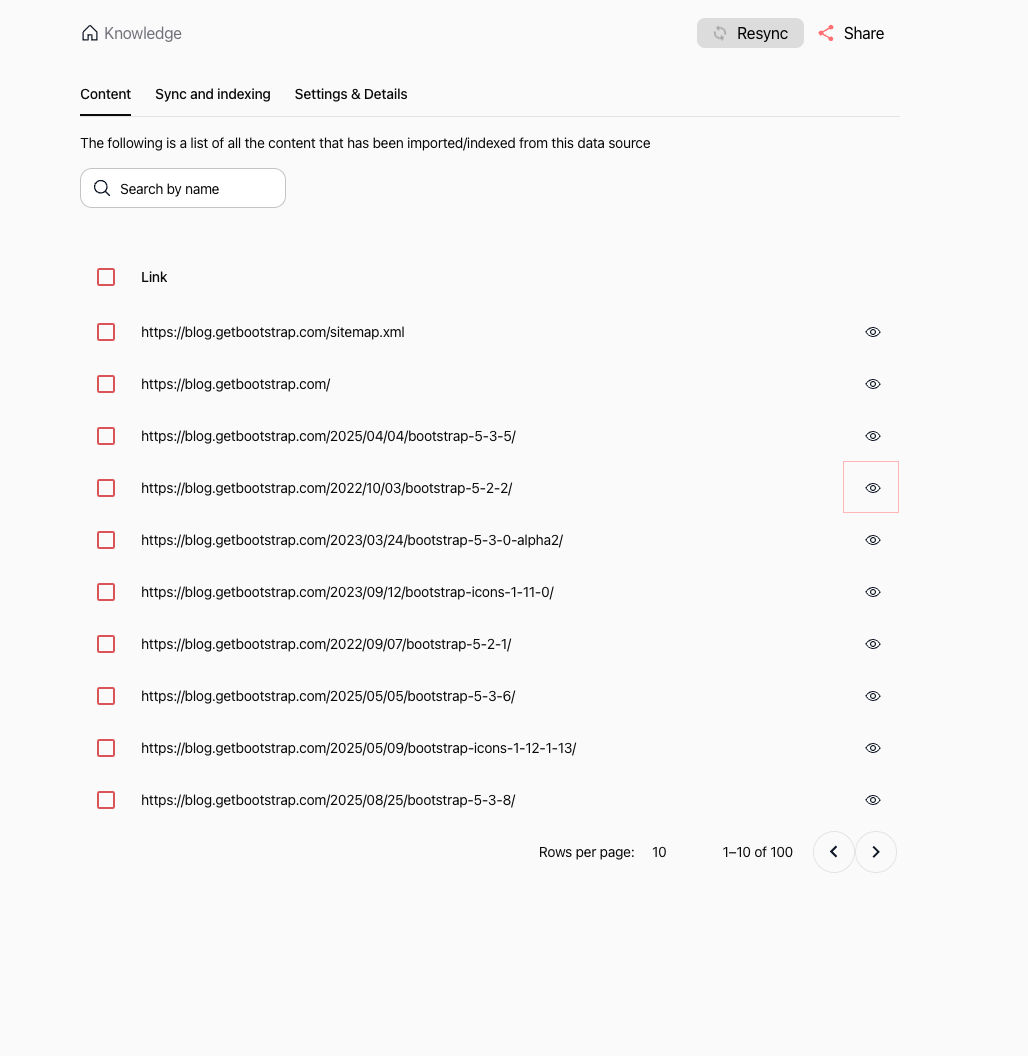
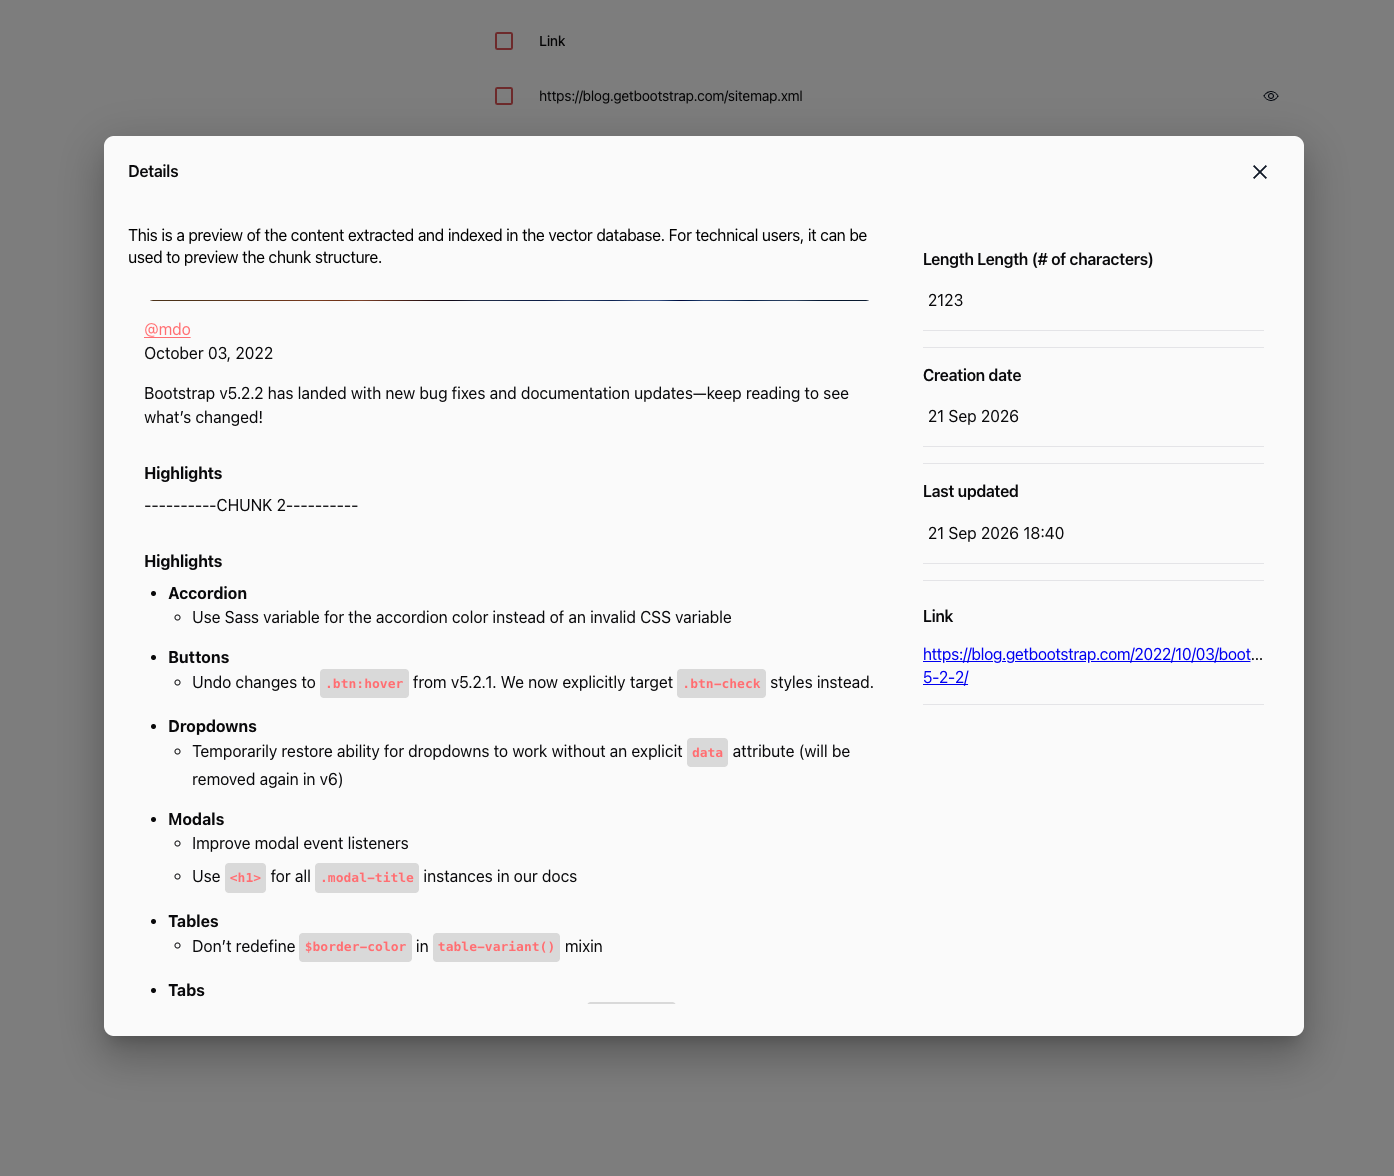
Click the eye icon next to any indexed URL to open the Details modal. This displays the raw text chunks, character count, timestamps, and direct link.
7. Manage data source settings
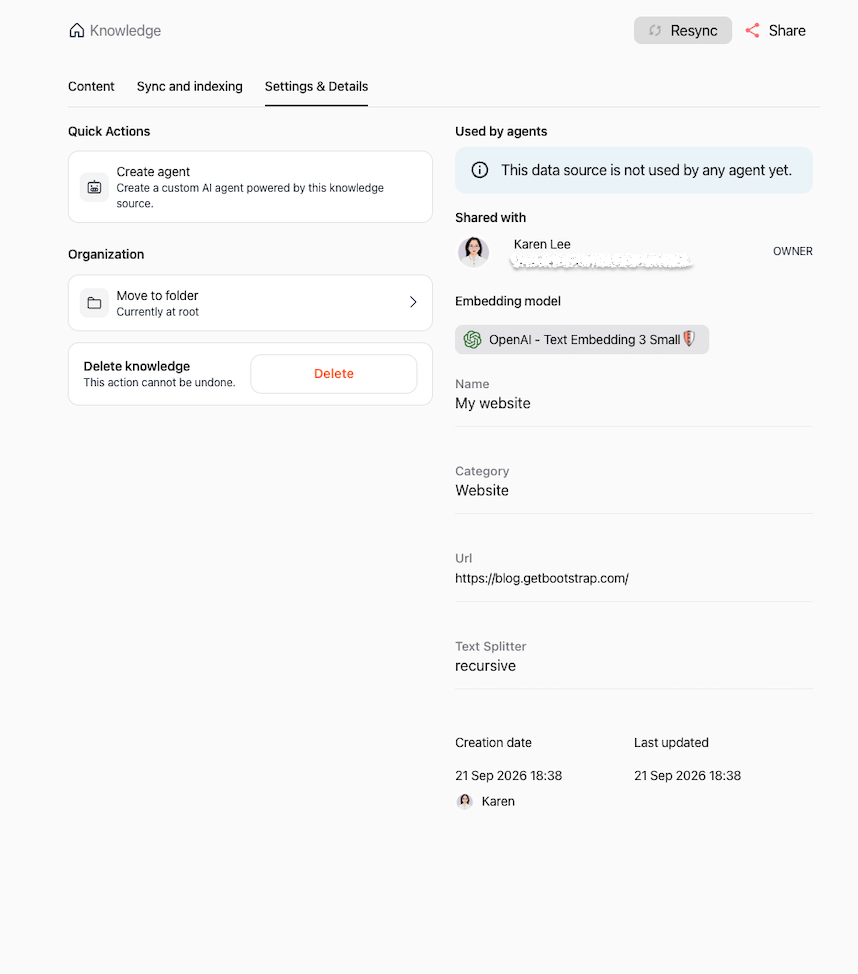
Click the Settings & Details tab to inspect data source properties, move the resource into a folder, create a dedicated AI agent, or delete the knowledge source.
Importing a webpage
1. Configure webpage details and optional settings
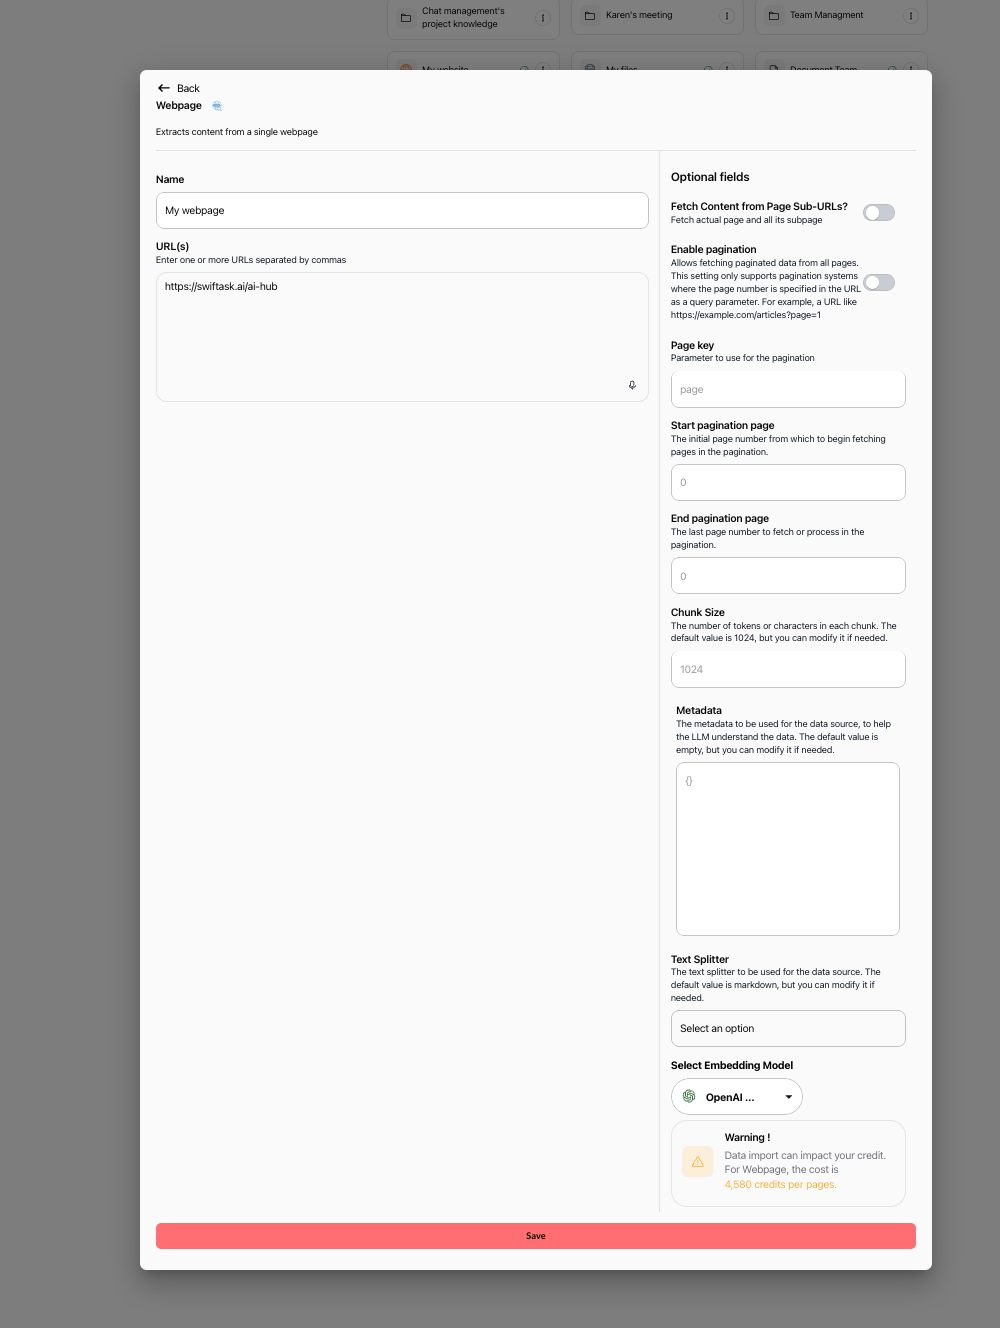
From the Import dropdown menu, select Import a web page. Enter a title in the Name field (e.g., "My webpage") and provide one or more specific page URLs separated by commas in the URL(s) field (e.g., https://swiftask.ai/ai-hub).
In the right-hand panel, configure optional settings:
Fetch Content from Page Sub-URLs?: Toggle on to scrape child links branching from the specified URL.
Enable pagination: Toggle on if the page uses pagination parameters (e.g.,
?page=1), and set the Page key, Start pagination page, and End pagination page.Chunk Size, Metadata, Text Splitter, Select Embedding Model: Adjust your advanced processing preferences.
Warning: Check the credit impact notice (4,580 credits per page for webpages).
Click the Save button to begin the import.
2. Monitor import progress
In your Knowledge list, the data source card shows an orange checkmark circle while the import and vectorization are processing.

Once indexing completes, the indicator turns into a green checkmark, confirming the content is ready for queries.
3. Review imported webpage content
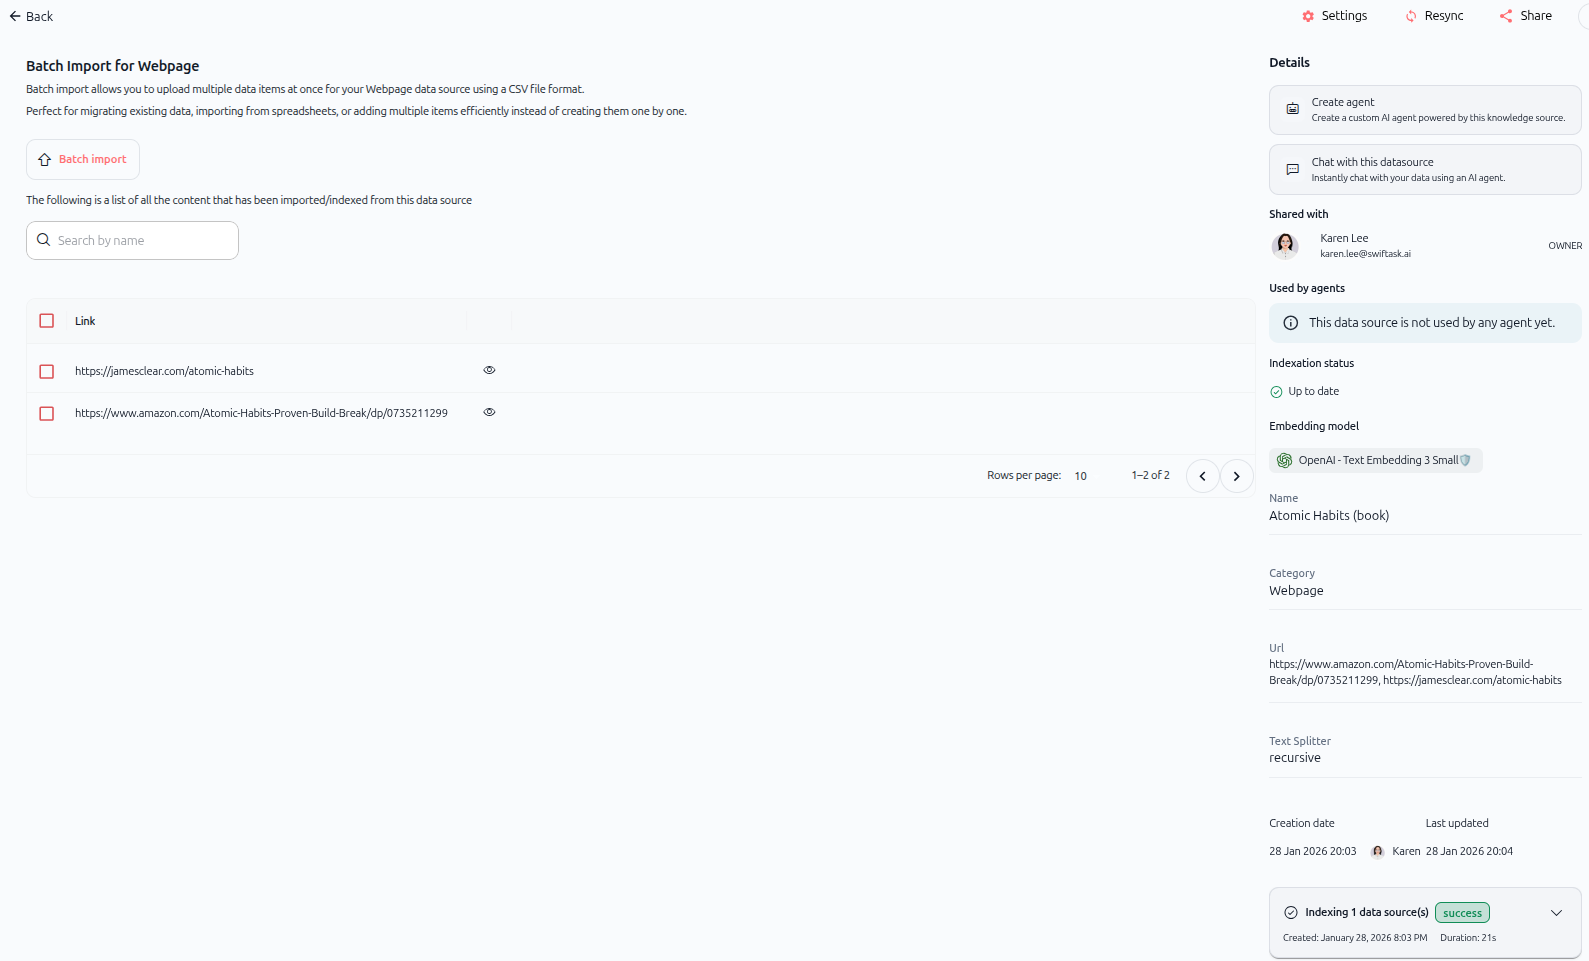
Open the data source from your Knowledge list to preview the extracted content, search indexed entries, and check metadata properties.
Batch importing web pages via CSV
When importing numerous specific web pages, you can upload a CSV file to add them all at once rather than entering them manually.
1. Open the batch import modal
Access the batch import view to upload your CSV file containing the target URLs and parameters.
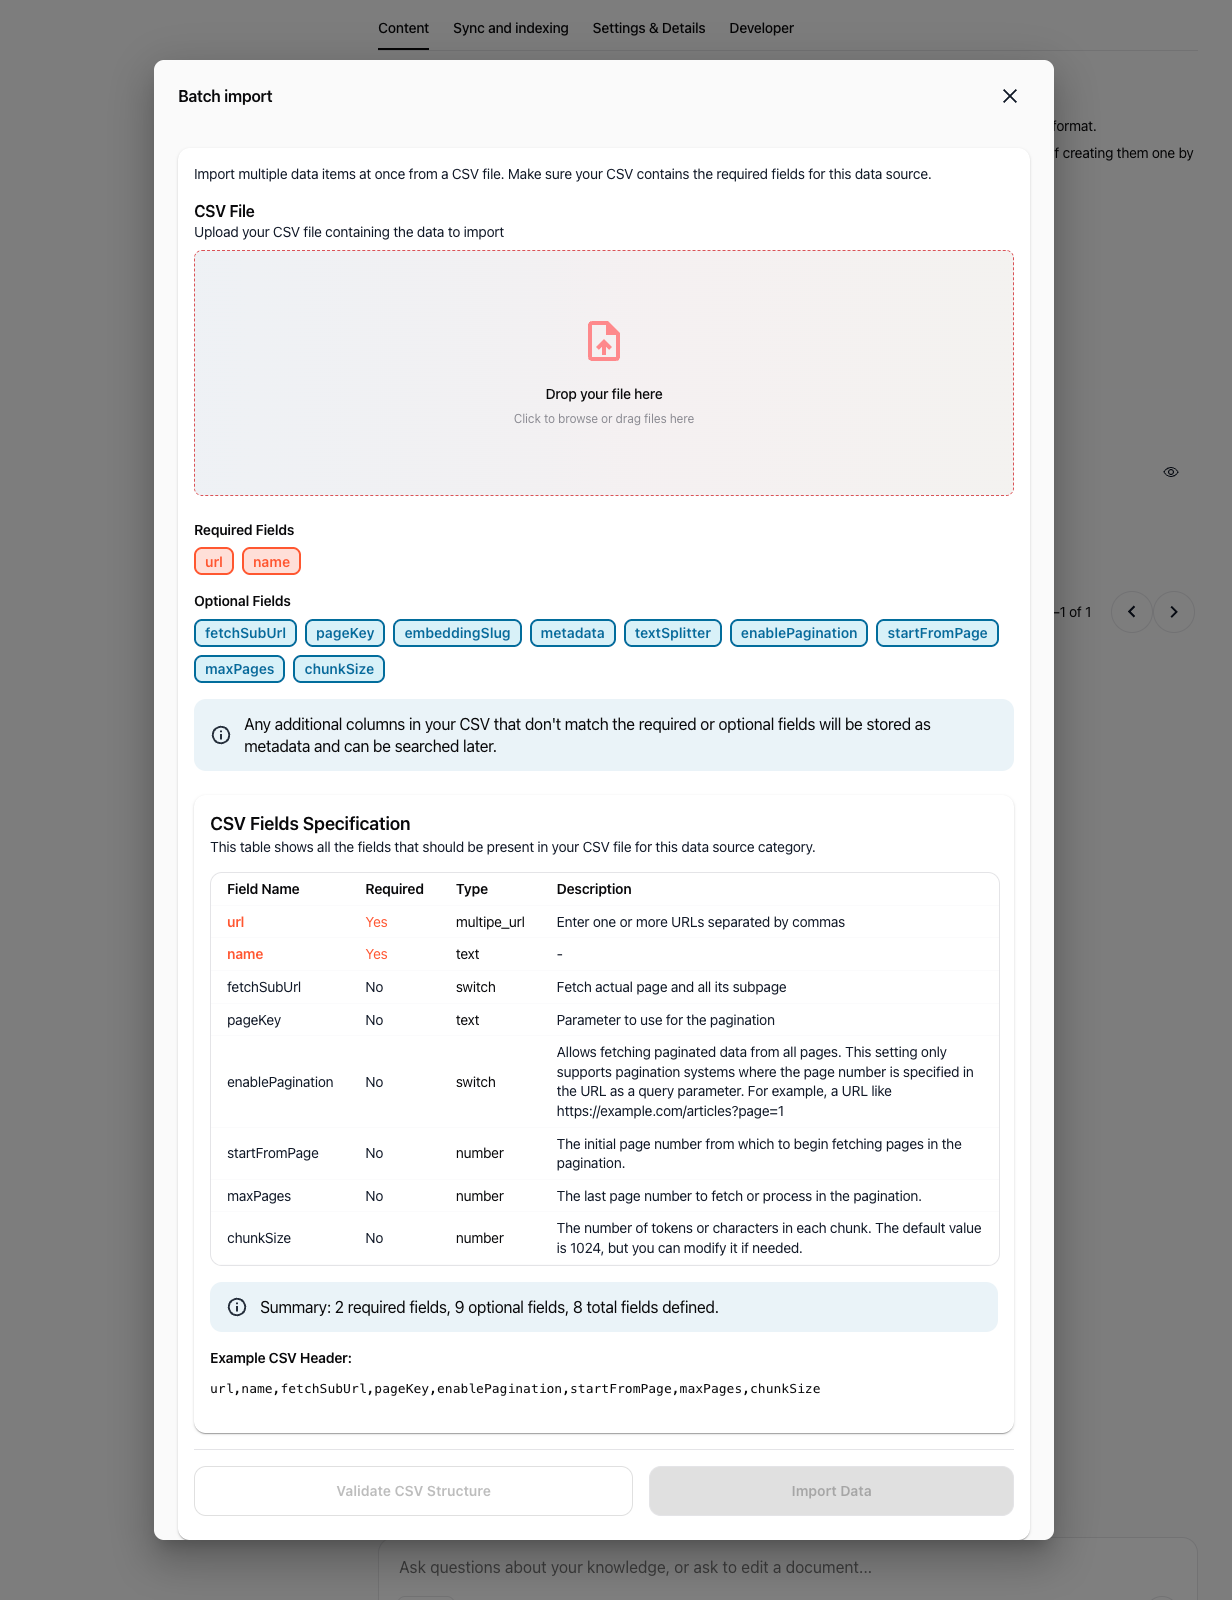
2. Verify CSV fields specification
Your CSV file must include the required columns and can optionally contain advanced configuration parameters:
Required fields:
url: One or more URLs separated by commas.name: Name of the item or data source.Optional fields:
fetchSubUrl: Set totrueorfalseto fetch child subpages.pageKey: URL query parameter used for pagination (e.g.,page).enablePagination: Set totrueorfalseto enable pagination crawl.startFromPage: Starting page number for pagination.maxPages: Last page number to fetch.chunkSize: Token or character chunk size (default: 1024).embeddingSlug: Identifier of the embedding model to use.textSplitter: Splitting method (e.g., markdown, recursive).metadata: Additional JSON metadata. Any extra columns in your CSV are automatically saved as metadata.
Example CSV header:
url,name,fetchSubUrl,pageKey,enablePagination,startFromPage,maxPages,chunkSize3. Validate and import
Click Validate CSV Structure to verify formatting, then click Import Data to execute the bulk import.
Practical use cases
Product documentation library: Import your software documentation site to provide support agents with real-time access to user guides and troubleshooting steps.
Competitor intelligence: Import competitor landing pages and product overviews to help marketing agents evaluate positioning and compare features.
Regulatory tracking: Import specific compliance guidelines or legal policy pages to ground legal agents on exact public standards.
Bulk research imports: Use CSV batch import to load dozens of industry analysis URLs at once for comprehensive research agents.
Tips & best practices
Filter out noisy paths: Use URLs to Exclude to skip non-informational pages such as login screens, shopping carts, or tag archives.
Check the credit cost first: Always verify the estimated page count and total credits before confirming large website crawls.
Inspect chunk previews: Use the eye icon on imported items to confirm that web text parsed cleanly without cookie banners or navigation clutter.
Use batch import for large URL lists: Instead of running multiple individual webpage imports, prepare a CSV file to save time and standardize settings.
Troubleshooting
URL validation fails:
Cause: The website is private, protected by automated bot security, or the URL format is incorrect.
Fix: Verify that the URL opens publicly in an incognito window, includes the
https://prefix, and allows public crawlers.No text extracted:
Cause: The page is rendered entirely with client-side JavaScript or consists solely of images.
Fix: Check if the webpage provides static HTML text, or copy key content into a direct Document source instead.
Credit cost exceeds expectations:
Cause: The website contains hundreds of nested or paginated links.
Fix: Restrict the crawler using URLs to Exclude or import specific URLs using webpage import.
CSV validation fails during batch import:
Cause: Missing required column headers (
url,name) or mismatched delimiter.Fix: Ensure headers match the exact names specified and values are properly escaped.
Additional resources
Introduction to Knowledge base: Understand how data sources ground AI agents and chat sessions.
Import documents / files: Learn how to upload local PDF, Word, and spreadsheet documents.
Automatic synchronisation: Schedule periodic updates for your cloud and connected data sources.
Was this helpful?
Still need help? Ask the team