LLM auto mode
Written By Stanislas
Last updated 16 days ago
Overview
LLM auto mode is an intelligent routing feature that automatically selects the best AI model for each message in a chat session. Instead of relying on a single model for all queries, you can define custom rules that associate specific models with distinct tasks or topics.
This setup optimizes credit usage by assigning simple requests to economical models and reserving high-capacity models for complex tasks. It also provides flexibility by letting users manually override model selection whenever needed.
When to use auto mode and advantages
When to use auto mode
Multi-purpose agents: When a single agent handles diverse workloads, such as general questions, document drafting, and data extraction.
Variable task complexity: When user prompts range from basic factual queries to multi-step reasoning that requires premium models.
Credit-sensitive operations: When you want to minimize workspace credit consumption without degrading response quality on demanding tasks.
Key advantages
Automated cost optimization: Automatically dispatches lightweight messages to economical models, reducing overall AI credit expenditure.
Seamless user experience: Users get optimal answers without having to manually identify and switch AI models for each prompt.
Session flexibility: Keeps full manual control readily accessible by allowing users to toggle off Auto mode and pin a specific model at any point.
Prerequisites
Before configuring LLM auto mode, ensure that you have:
Edit access to the agent (Agent Owner or Admin role).
A clear understanding of the tasks, topics, or complexity levels you want to distribute across models.
Available credits in your workspace.
This feature is available on all Swiftask plans.
Step-by-step guide
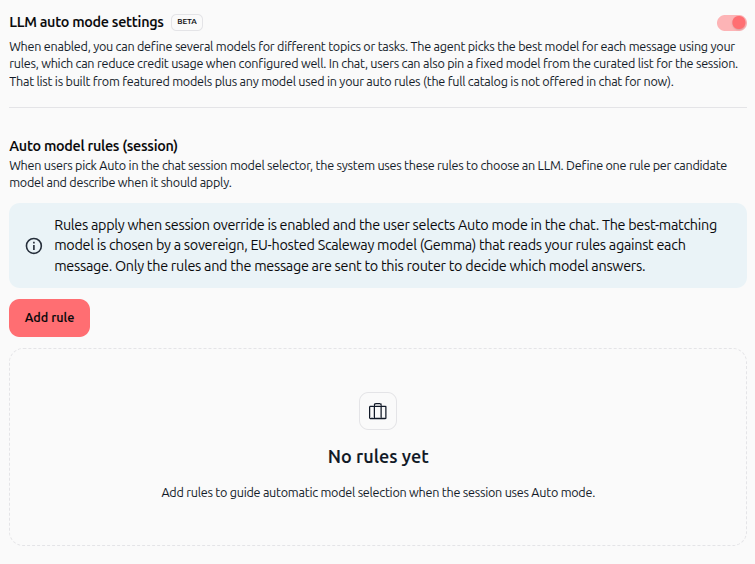
Enable LLM auto mode settings
Navigate to Agents from the main navigation and click on the agent you want to edit.
Go to Agent settings and select LLM.
Locate the LLM auto mode settings section.

Toggle the switch to enable LLM auto mode settings.
When active, the Auto model rules (session) section and the Add rule button appear.
Add auto model rules
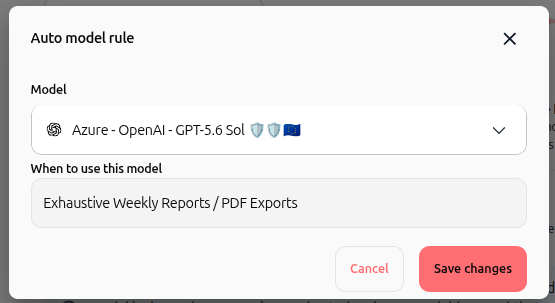
Under Auto model rules (session), click Add rule.
In the Model dropdown, select the target AI model.
In the When to use this model field, enter a concise description of the task, topic, or format that triggers this model.
Click Save changes.
Manage existing rules
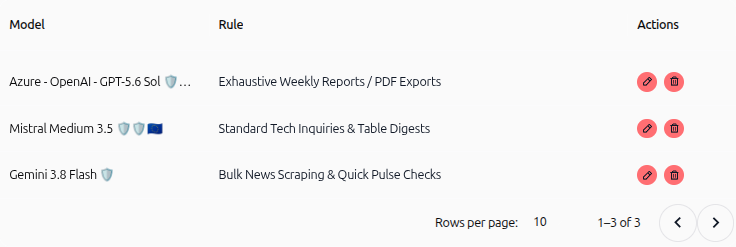
Review your configured rules in the rules table.
Click the red pencil icon under Actions to edit a rule's model or condition.
Click the red trash icon under Actions to delete a rule.
How routing works
When Auto mode is active, the system evaluates each incoming message against your configured auto model rules. It selects the best-matching model based on the descriptions you provided for each task or topic.
Only the rule definitions and the message text are evaluated to make the selection decision. The selected model then generates the final response.
Interact in chat sessions
Open a conversation with your agent in Chat.
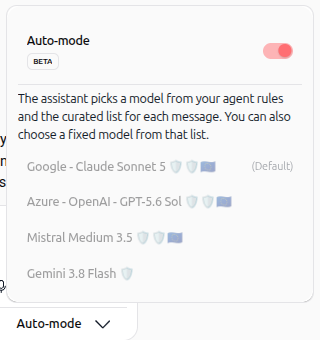
Notice the Auto-mode indicator displayed in the bottom-right corner of the composer.
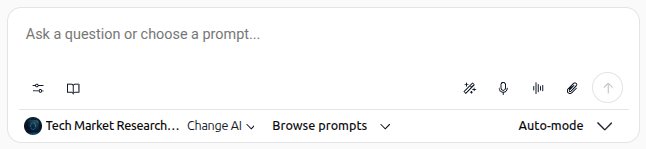
Click Auto-mode to open the model menu.
While the toggle remains enabled, the agent dynamically picks a model from your rules and the curated list for each message.
Override auto mode manually
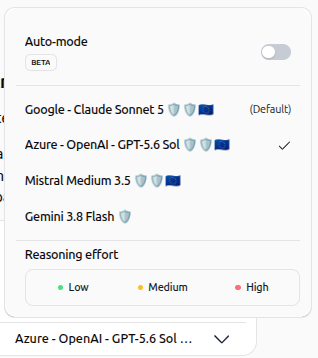
Open the Auto-mode dropdown in the chat composer.
Click the Auto-mode toggle switch to turn it off.
Select a specific model from the curated list to pin it for the current session.
If applicable, select a Reasoning effort level (Low, Medium, or High).
Practical use cases
Long-form report generation
Route complex tasks such as "Exhaustive Weekly Reports / PDF Exports" to a heavy-reasoning model, ensuring structured and detailed outputs.
Everyday queries and table summaries
Assign "Standard Tech Inquiries & Table Digests" to a balanced model to handle routine technical questions quickly with moderate credit consumption.
High-volume scraping and pulse checks
Direct "Bulk News Scraping & Quick Pulse Checks" to a fast and economical model to minimize credit usage during high-frequency tasks.
Tips & best practices
Keep rule descriptions short and focused on specific tasks, keywords, or formats.
Avoid overlapping rule descriptions so the routing system can make unambiguous choices.
Include economical models for standard Q&A and premium models only for specialized tasks.
Use manual overrides when you need uniform responses across an entire conversation.
Troubleshooting
Router selects the wrong model
Cause: Rule descriptions are too broad or overlap with each other.
Fix: Refine the text in When to use this model with distinct keywords describing the specific task.
Rules do not trigger in chat
Cause: The chat session has Auto-mode toggled off.
Fix: Click the model dropdown in the chat composer and ensure the Auto-mode toggle is switched on.
A specific model does not appear in the manual chat list
Cause: The chat list only displays featured models and models assigned to active auto rules.
Fix: Add the model to an auto rule in agent settings to make it selectable in chat.
Additional resources
Setting objectives and instructions for your agent
Testing and interacting with the agent
Was this helpful?
Still need help? Ask the team