Group chat & collaboration
Written By Stanislas
Last updated 16 days ago
Overview
Task chat provides a dedicated conversation space for every task in your project. Instead of fragmenting work updates across email threads or external messengers, discussions remain directly attached to the task itself.
Team members and AI agents operate with immediate access to the task's context, including its description, assignees, deadlines, and history. This eliminates the need to repeat background details and ensures coordinated execution.
Prerequisites
An active Swiftask workspace account.
Access to a project with Member, Admin, or Owner permissions (Viewers have read-only access).
At least one AI agent assigned or available in the workspace if delegating tasks to AI.
Step-by-step guide
1. Create a task with immediate agent processing
Navigate to Projects from the left navigation bar and open your project board.
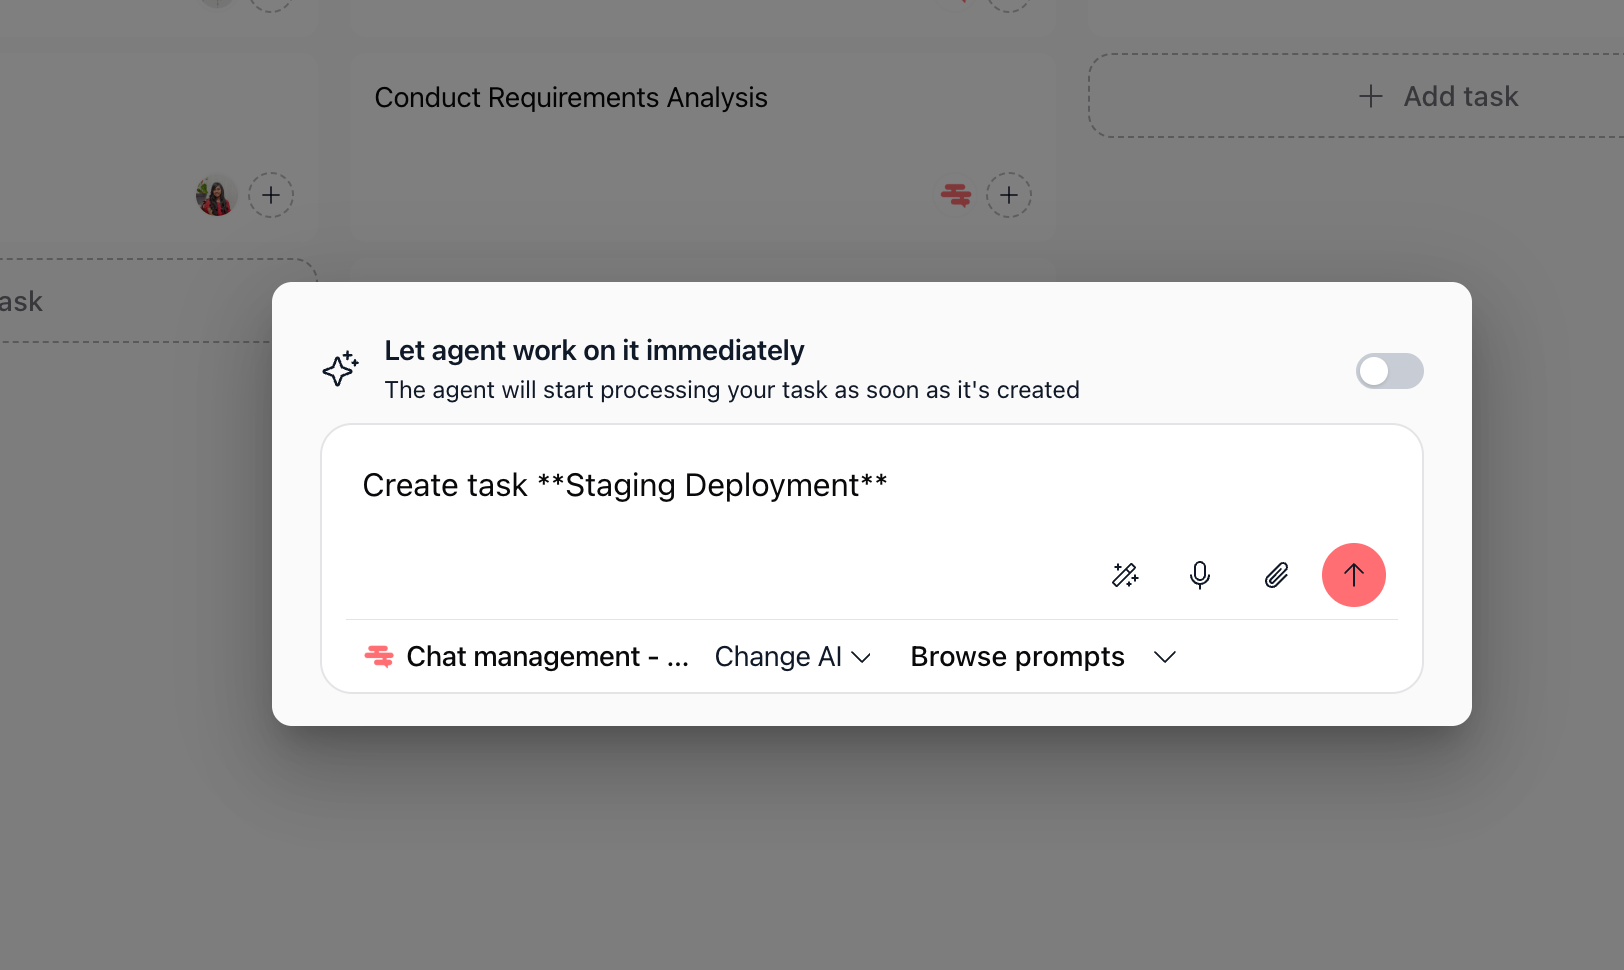
Click + Add task in the target section (such as In Progress or To Do).
Type your task title and prompt instructions into the task input modal.
Enable the Let agent work on it immediately toggle if you want the selected agent to start processing and reply as soon as the task is created.
Select your preferred AI agent via Change AI or choose a prompt template via Browse prompts, then click the red Send button.
2. Open and interact in task chat
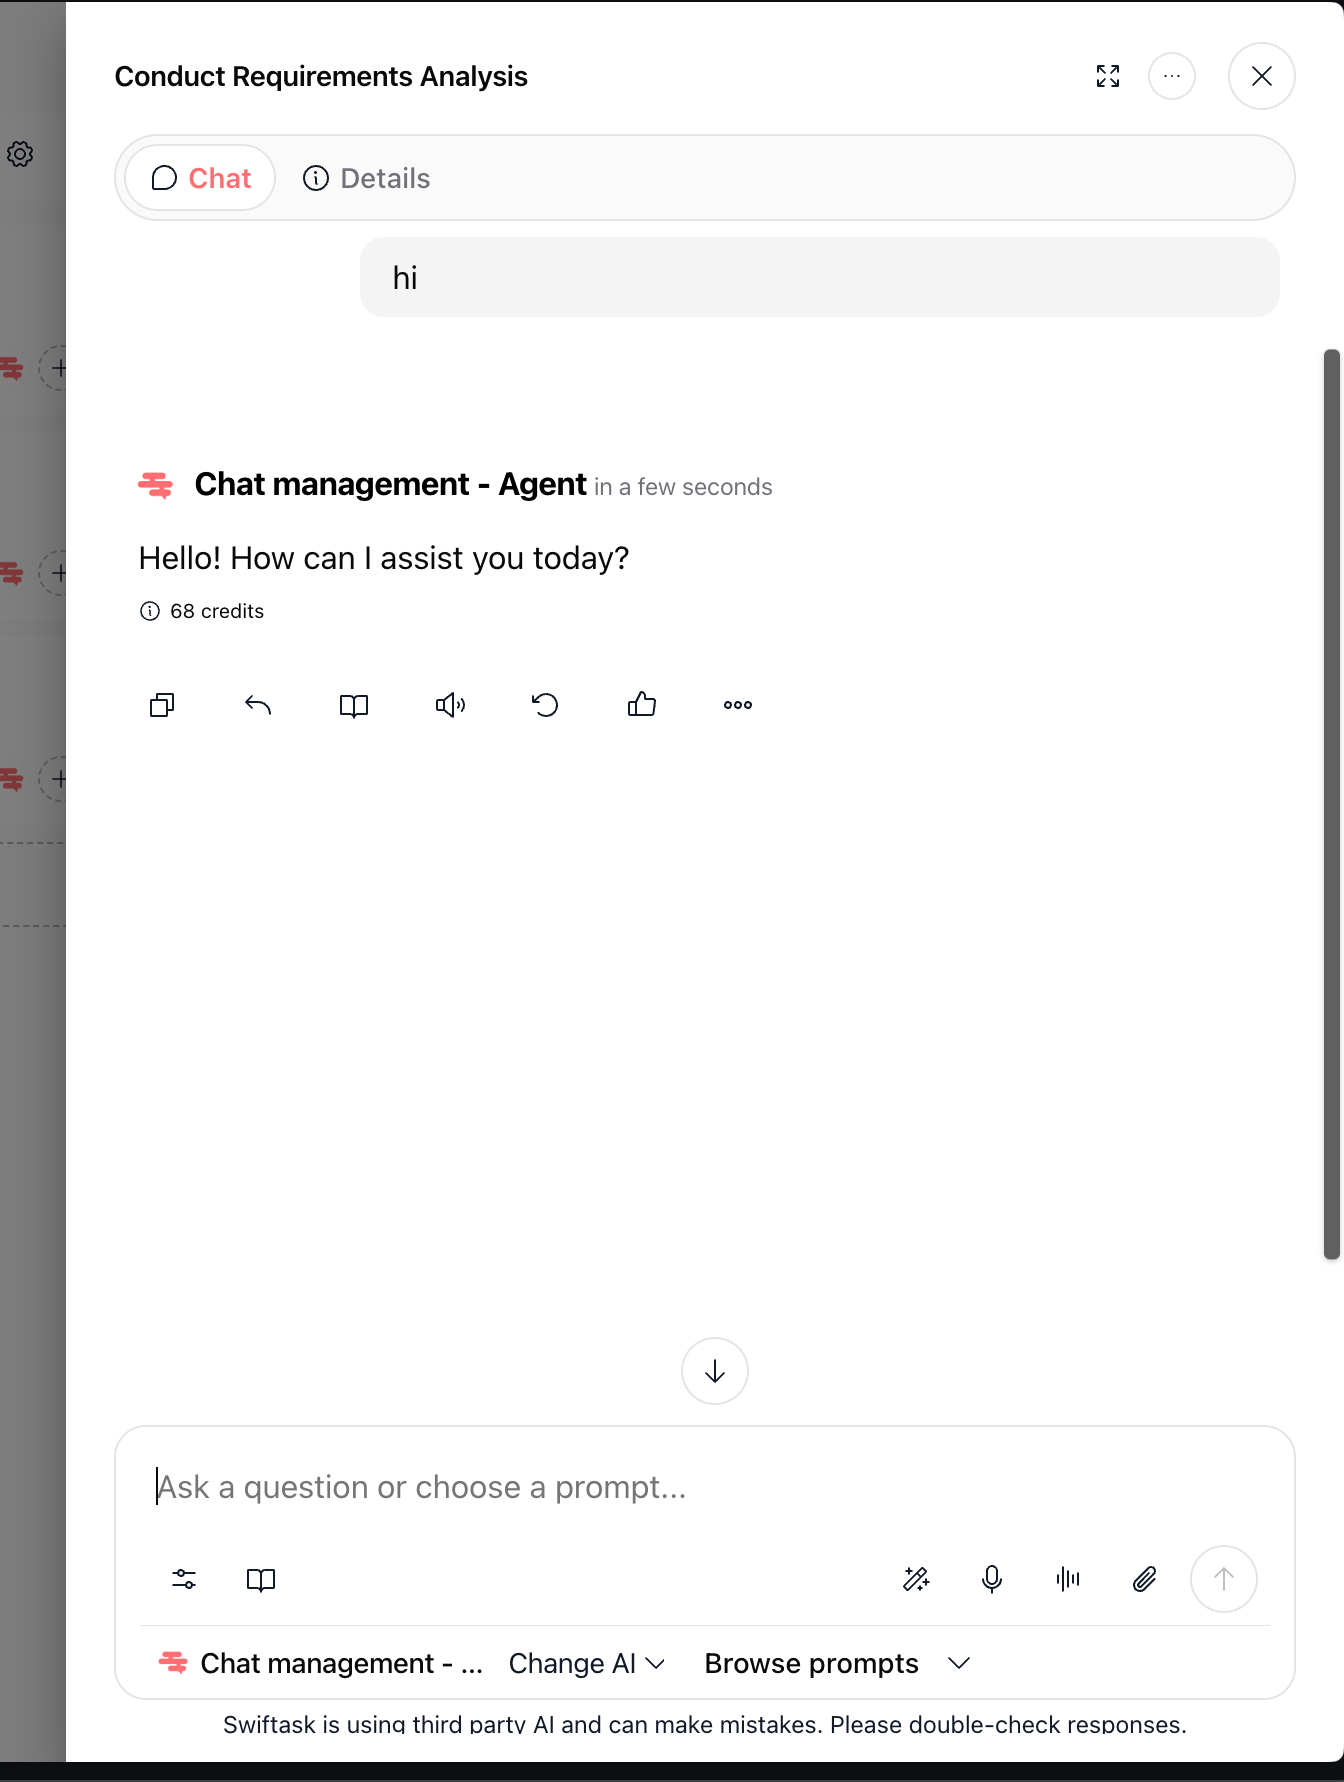
Click on any task card to open the task window.
Select the Chat tab at the top of the modal.
Review previous messages or view the real-time response generated by the assigned AI agent.
Type your message into the input field at the bottom and click the Send button.
3. Review and update task details
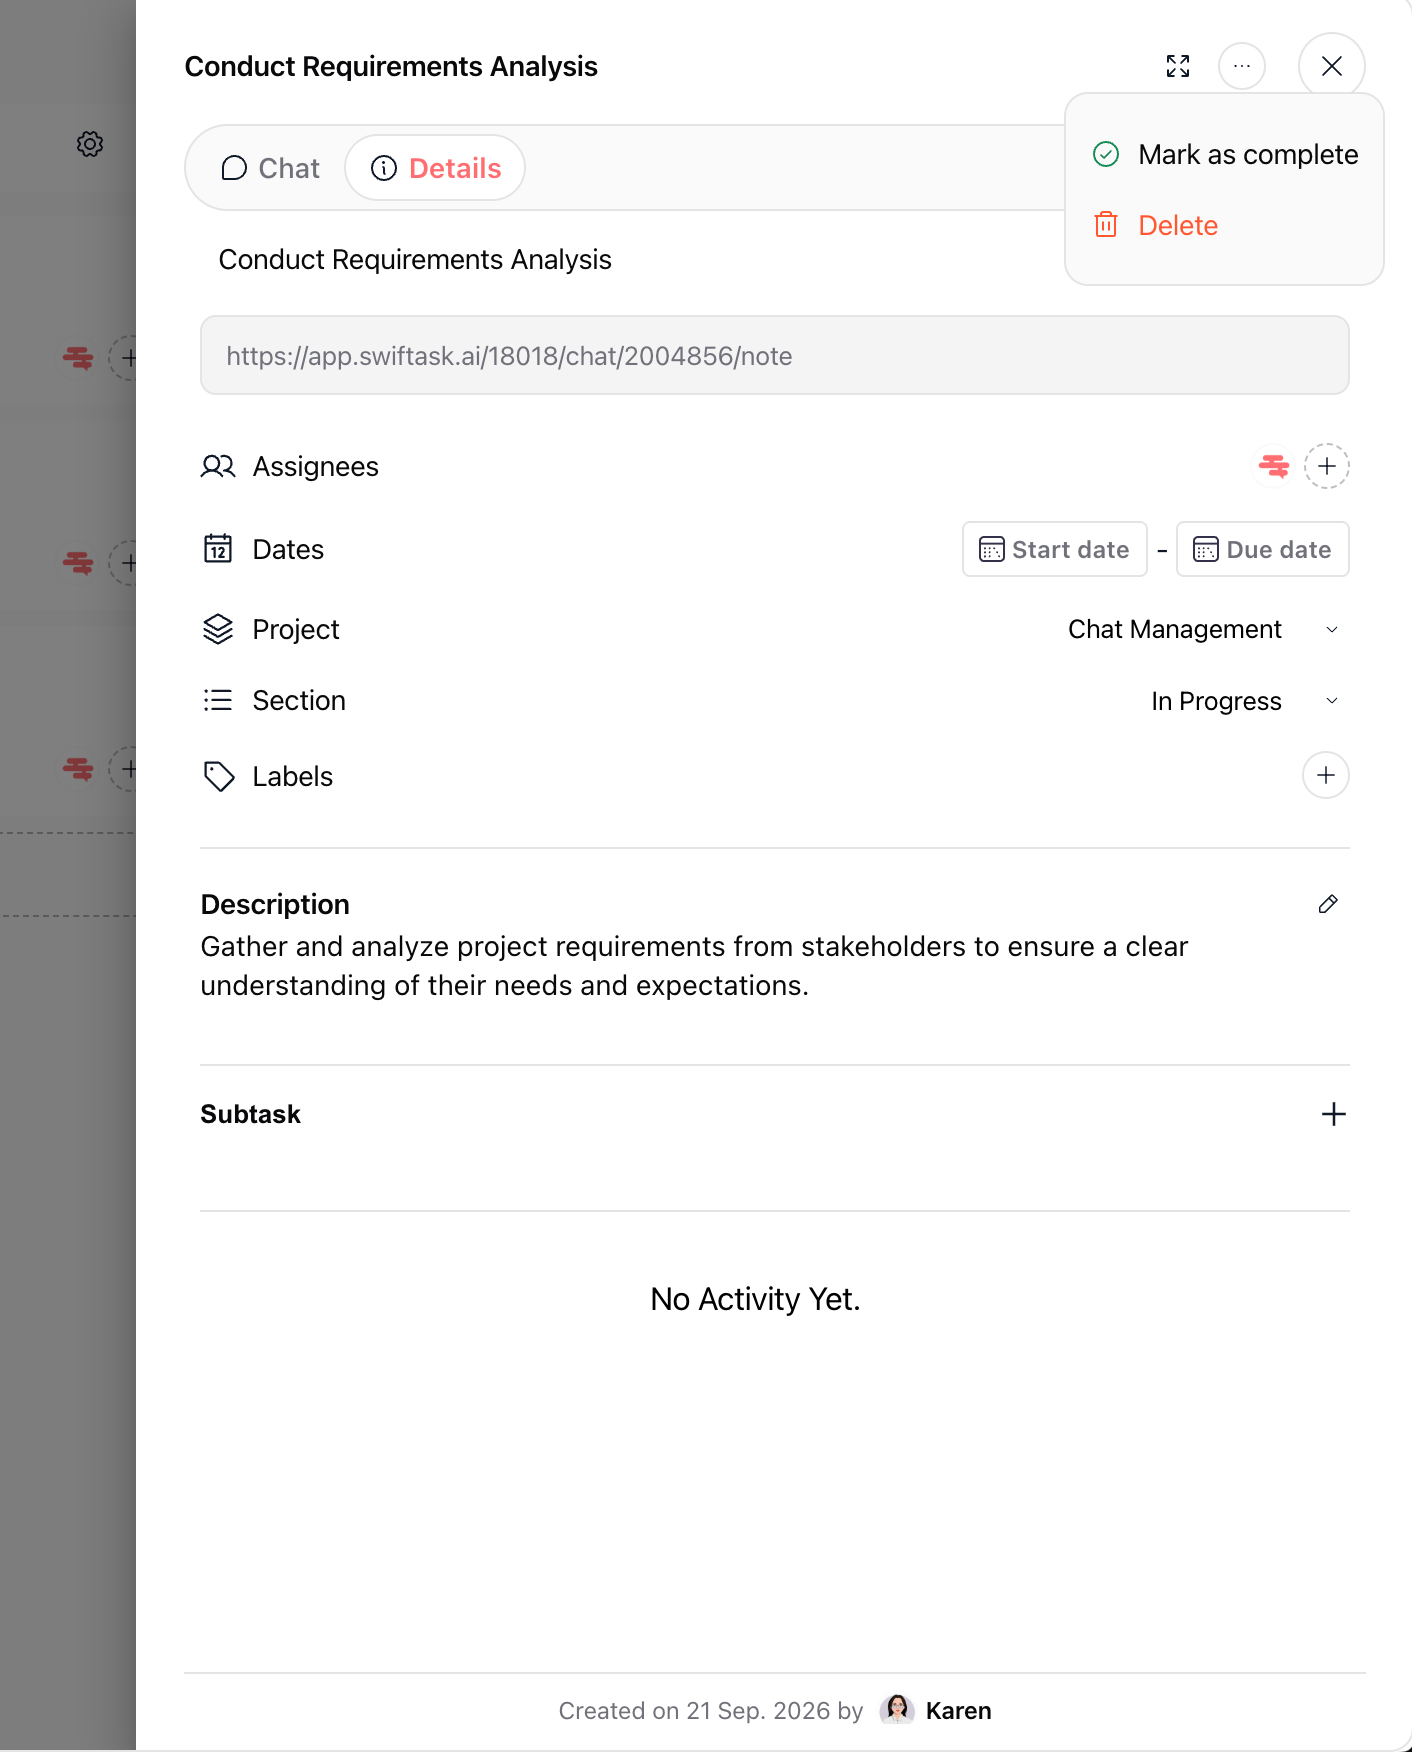
In the task modal, click the Details tab.
Update task attributes such as Assignees, Dates (start date and due date), Project, Section, Labels, or Description.
Add checklist items under Subtask to break down deliverables.
Click the three-dot menu (…) in the upper-right corner to access options such as Mark as complete or Delete.
4. Switch between modal and split-screen view
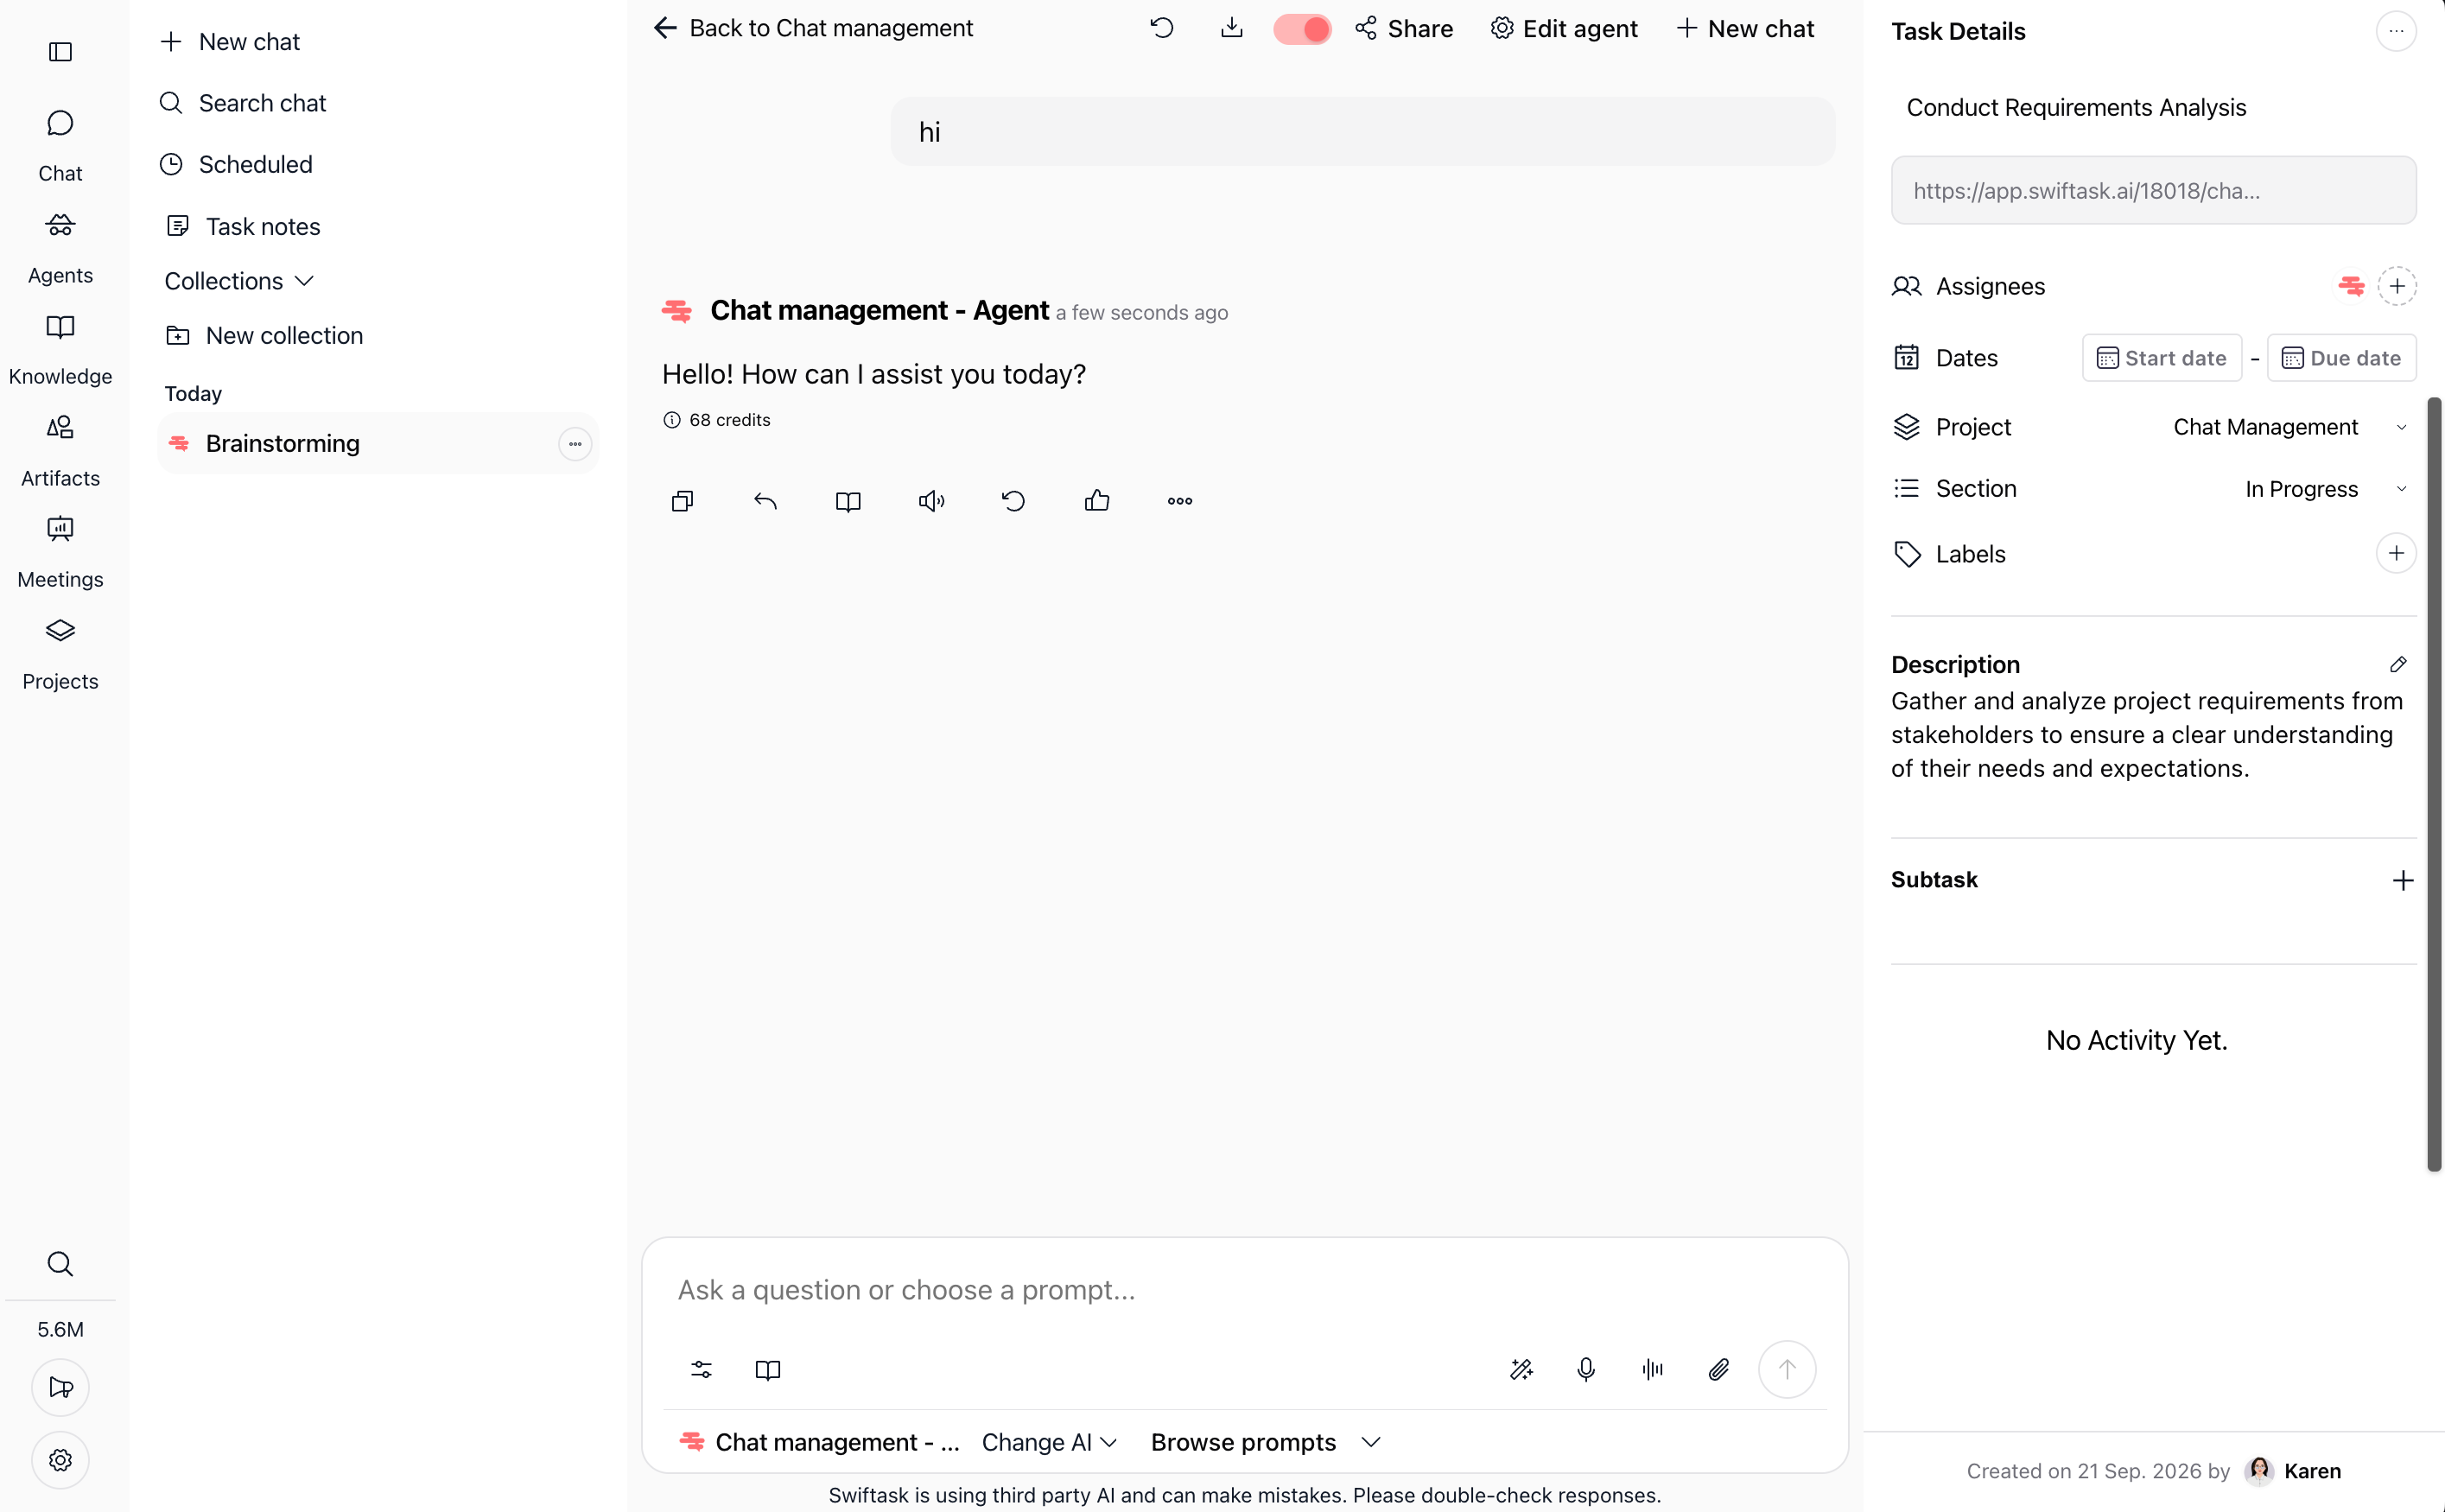
In the top-right corner of the task window, click the expand icon (⤢) to enter full-screen view.
The interface displays the central chat conversation alongside a dedicated Task Details panel on the right.
Access navigation shortcuts such as Back to Chat management, Share, Edit agent, or New chat in the top header.
5. Format your messages
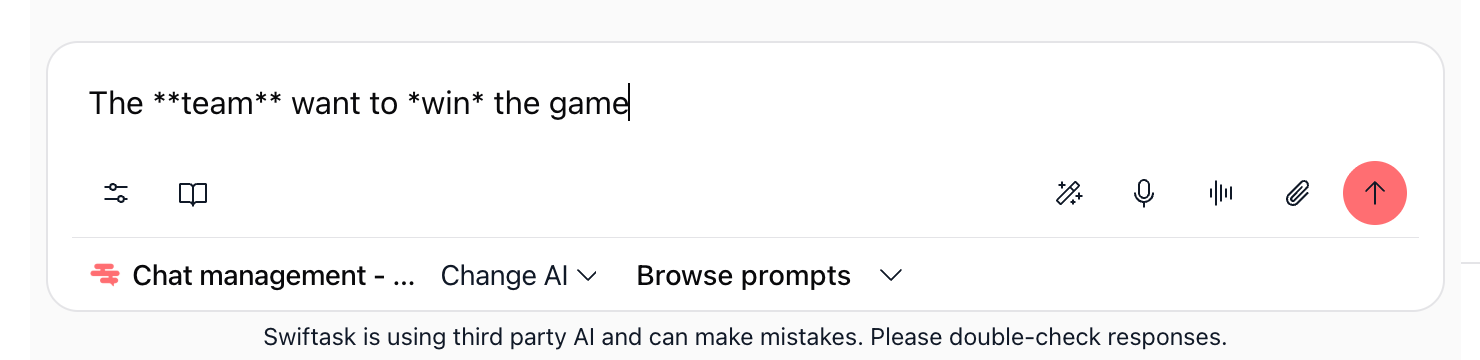
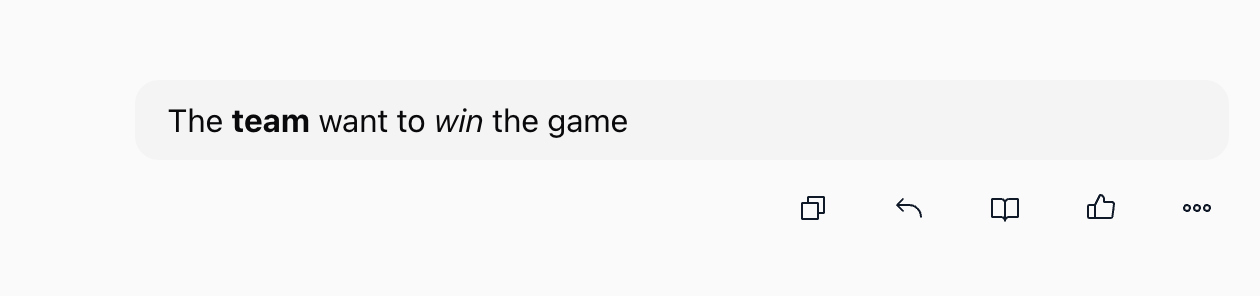
Format your text directly in the chat input using Markdown syntax:
Bold: wrap text in double asterisks (
**team**).Italic: wrap text in single asterisks (
*win*).
Utilize the bottom toolbar to adjust parameters, select prompt templates, activate voice dictation, or attach documents.
Send the message to see the formatted output rendered cleanly in the conversation thread.
6. Reply in thread to specific messages
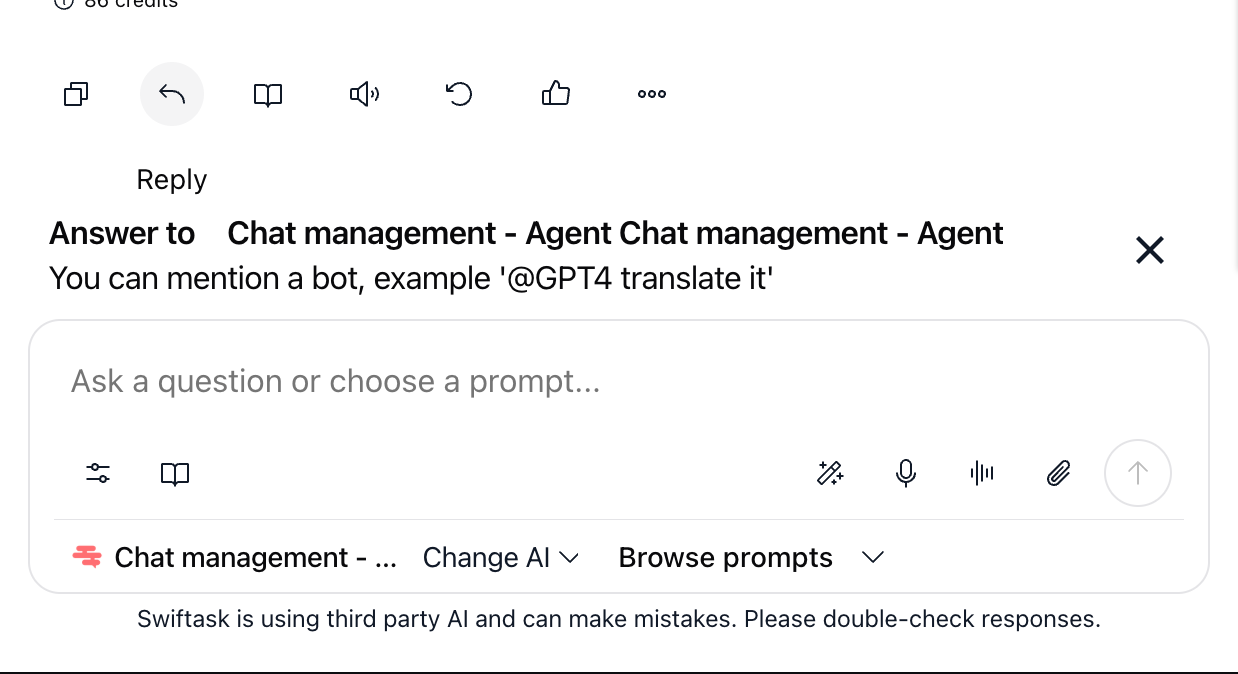
Hover over the message you want to reference and click the Reply icon.
An Answer to [Sender] quote banner appears above the input field displaying the referenced text.
Type your response and send it to keep replies clearly connected to specific questions or instructions.
7. Delete messages
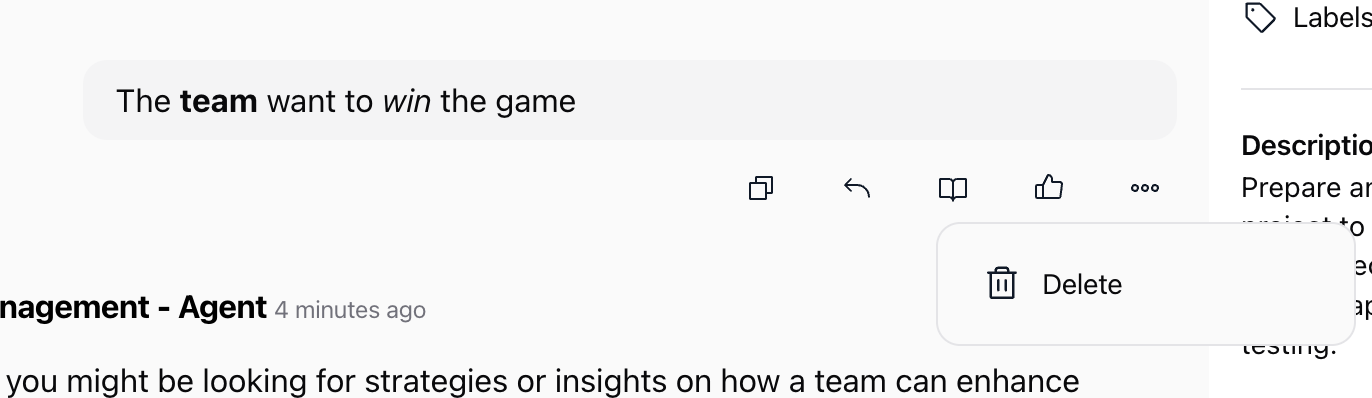
Hover over the message you want to remove.
Click the three dots (…) on the message action bar.
Click Delete to permanently remove the message from the thread.
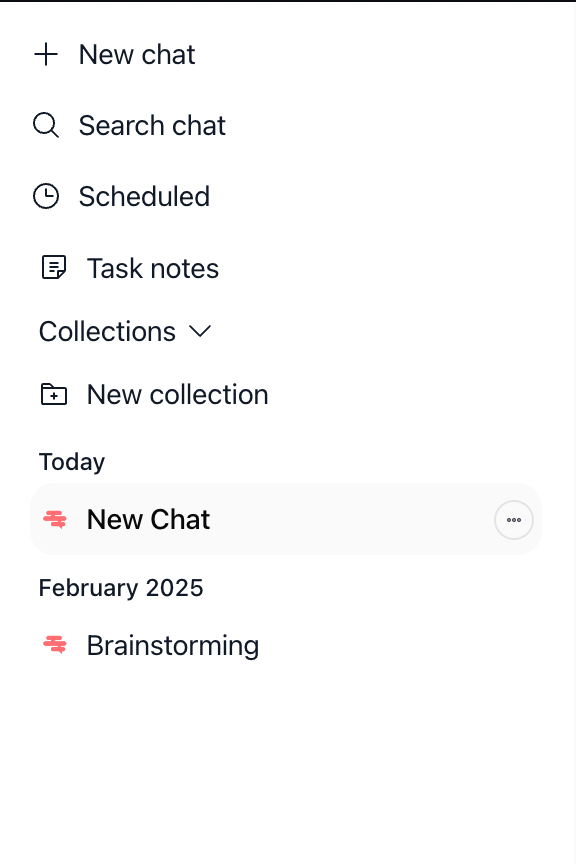
8. Navigate chat history and past sessions
Open the left sidebar to view recent conversations grouped by time period (such as Today or specific months).
Click on any past session to immediately load its conversation history.
Use the three-dot menu next to any session in the list to manage session settings or rename threads.
9. Search and filter conversations
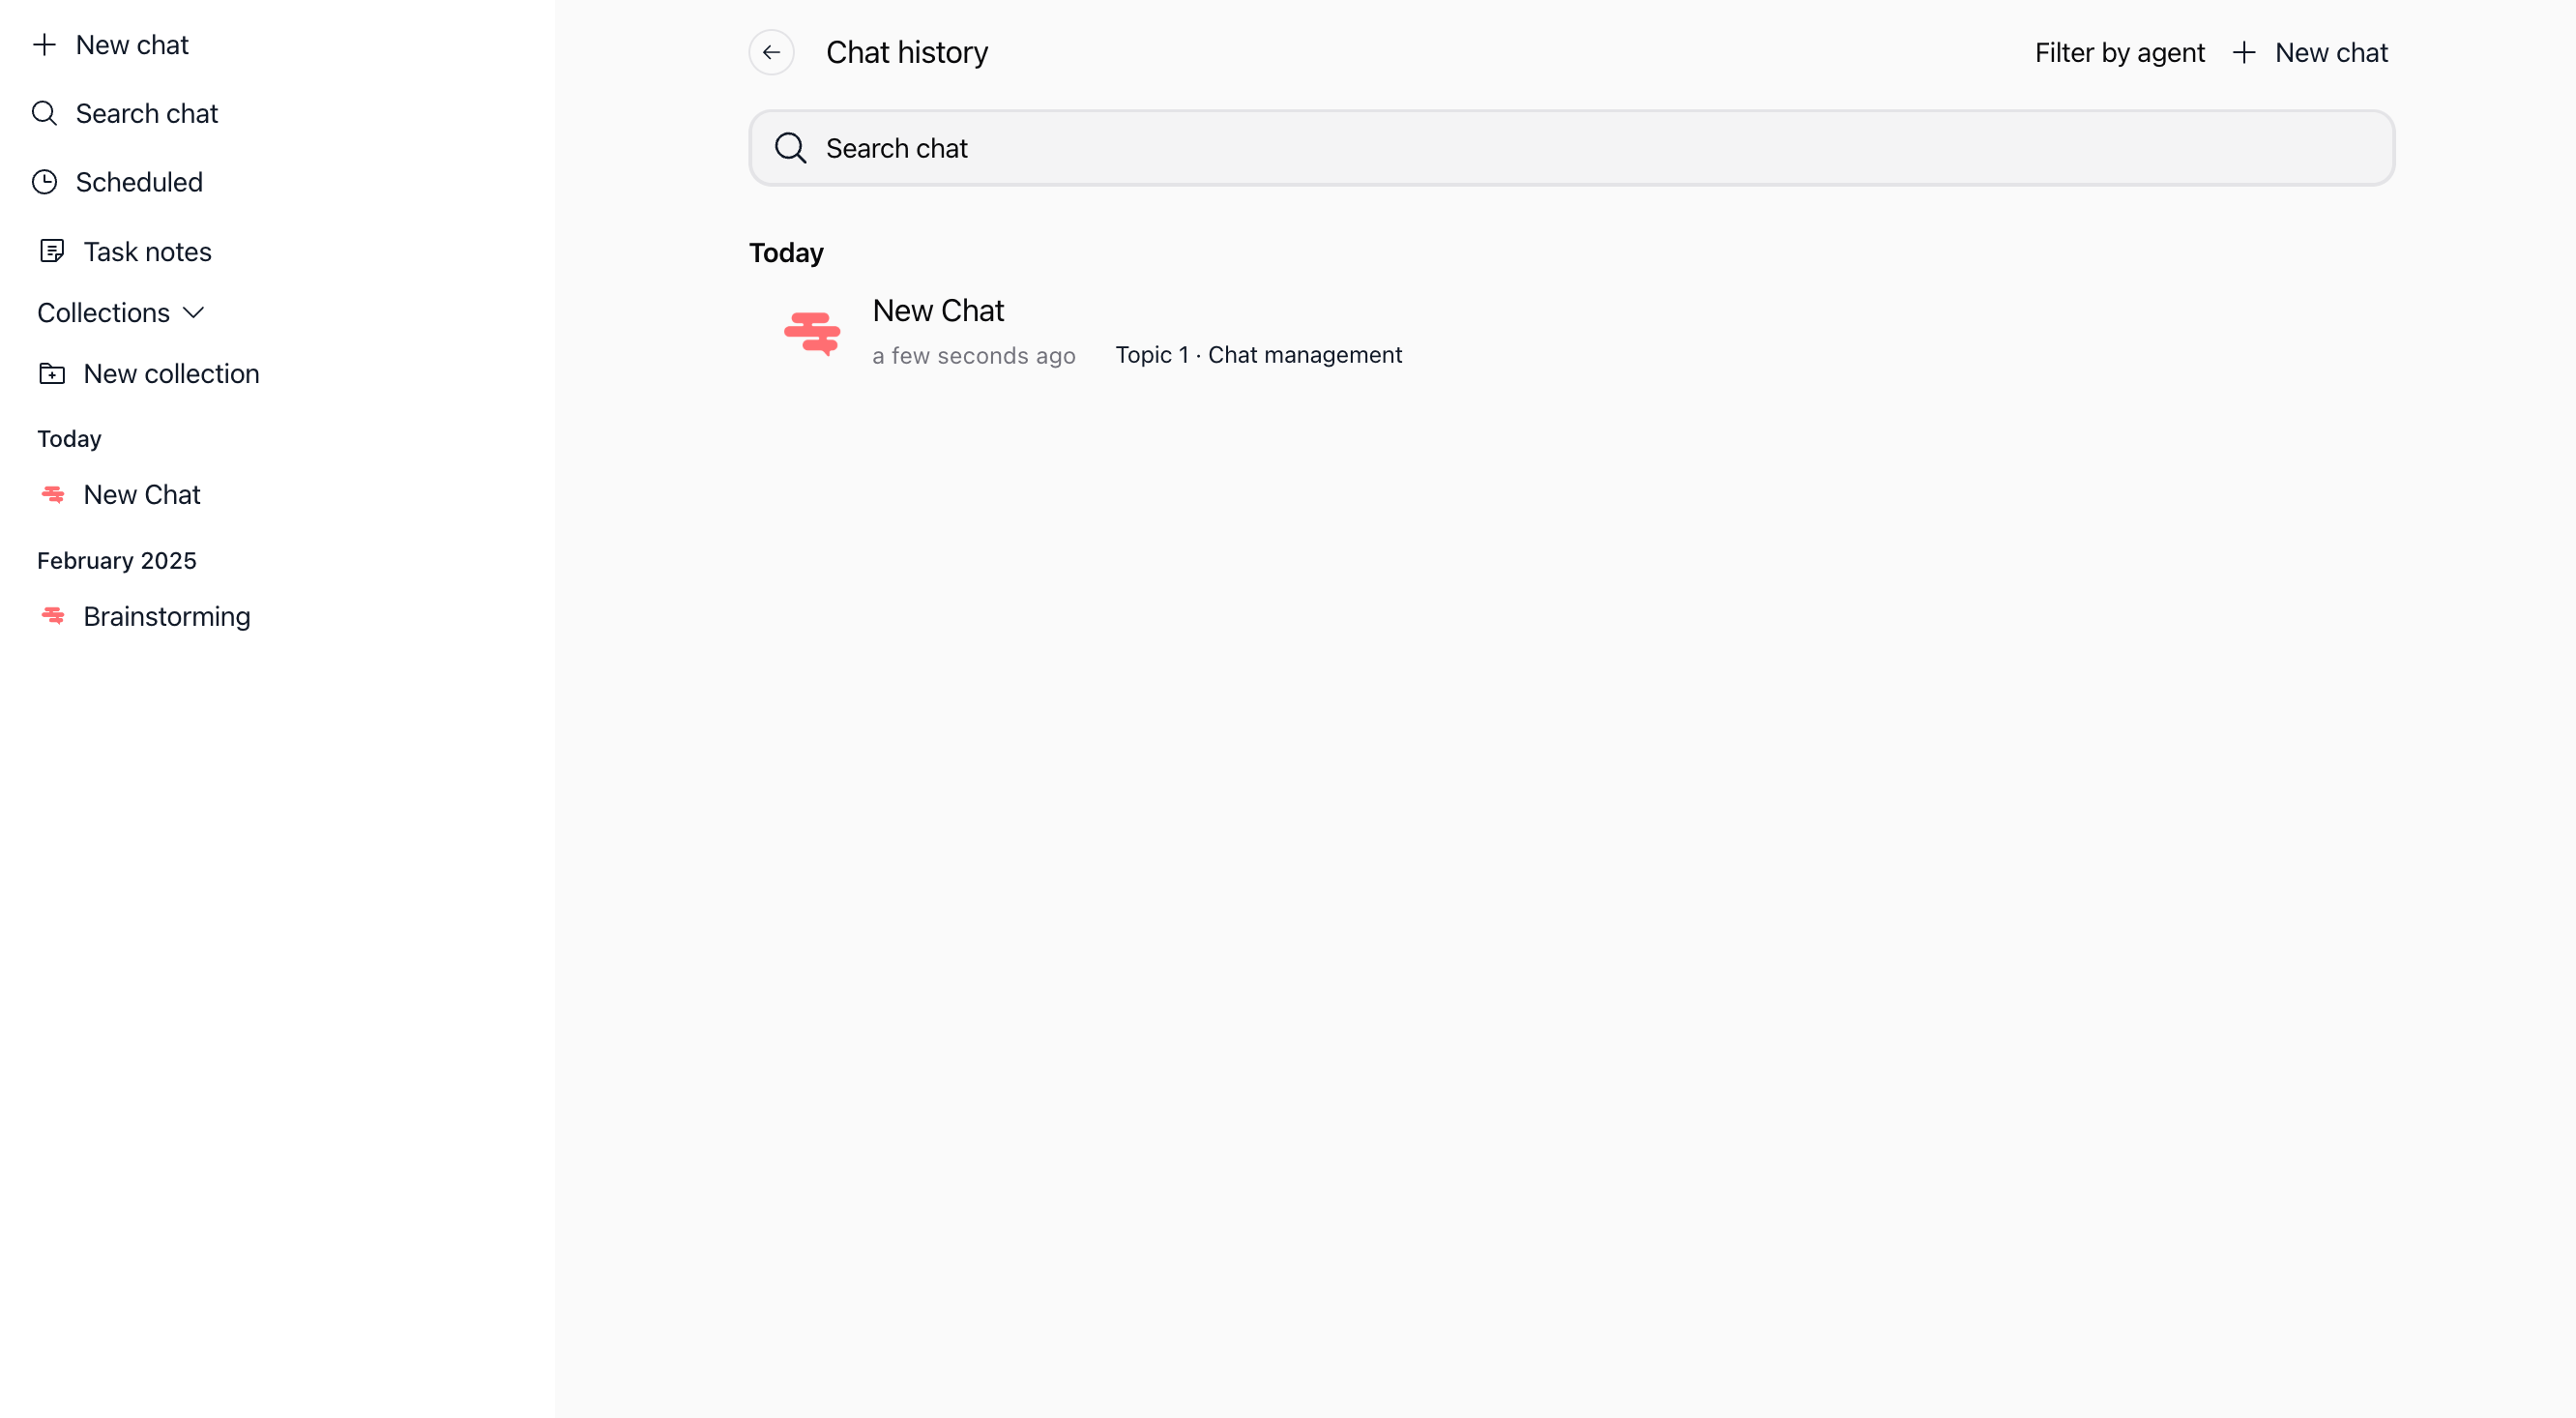
Click Search chat in the sidebar to open the full chat history dashboard.
Enter keywords in the Search chat bar to locate specific messages across sessions.
Use Filter by agent to isolate conversations handled by a particular AI assistant.
Practical use cases
Automated task kickoff: Create a task such as "Staging Deployment", toggle "Let agent work on it immediately", and have your deployment agent prepare the release notes and checklist automatically.
Contextual design review: Share mockups and gather feedback from colleagues and design agents within the task chat without leaving the Kanban board.
Collaborative requirements analysis: Document stakeholder requirements in the Details tab, then brainstorm user stories directly with your team in the Chat tab.
Tips & best practices
Leverage the immediate execution toggle: Enable "Let agent work on it immediately" for routine tasks where an agent can draft deliverables upfront.
Use quote replies in active threads: When multiple teammates discuss a task, click Reply on specific messages to maintain clear conversational context.
Pin key data in task details: Keep critical links, assignees, and deadlines updated in the Details tab so agents and teammates always reference current facts.
Troubleshooting
Agent does not respond automatically: Verify whether "Let agent work on it immediately" was enabled during task creation. If disabled, send a prompt directly in the Chat tab or mention the agent.
Cannot delete a message: Ensure you are attempting to delete your own message. Workspace permissions restrict regular members from deleting messages authored by others.
Chat details panel not visible: Click the expand icon (⤢) in the modal header to switch to the full-screen view where the details panel sits alongside the conversation.
Additional resources
Was this helpful?
Still need help? Ask the team