Recording meetings on desktop
Written By Stanislas
Last updated 16 days ago
Overview
Recording meetings through the desktop app captures crystal-clear audio directly from your computer. The app transcribes conversations in real time, identifies speakers, and extracts key points and action items.
Use desktop meeting recording during virtual conference calls, internal standups, and customer discovery sessions.
Prerequisites
To record meetings on the desktop app, you need:
The Swiftask desktop app installed and authenticated.
A functional microphone connected to your computer.
Microphone permissions enabled in your operating system settings.
A supported conferencing platform (Zoom, Microsoft Teams, Google Meet, or others).
Step-by-step guide
1. Enable automatic meeting detection
Open the Swiftask desktop app and keep it running in the background.
Start or join a call in Zoom, Microsoft Teams, or Google Meet.
The desktop app detects the conversation and automatically begins recording.
[Screenshot: Desktop → Notification → Automatic recording started]
2. Start a manual recording
Open the Swiftask desktop app.
Click Meetings in the left sidebar.
Click the red Record meeting button in the top right corner.
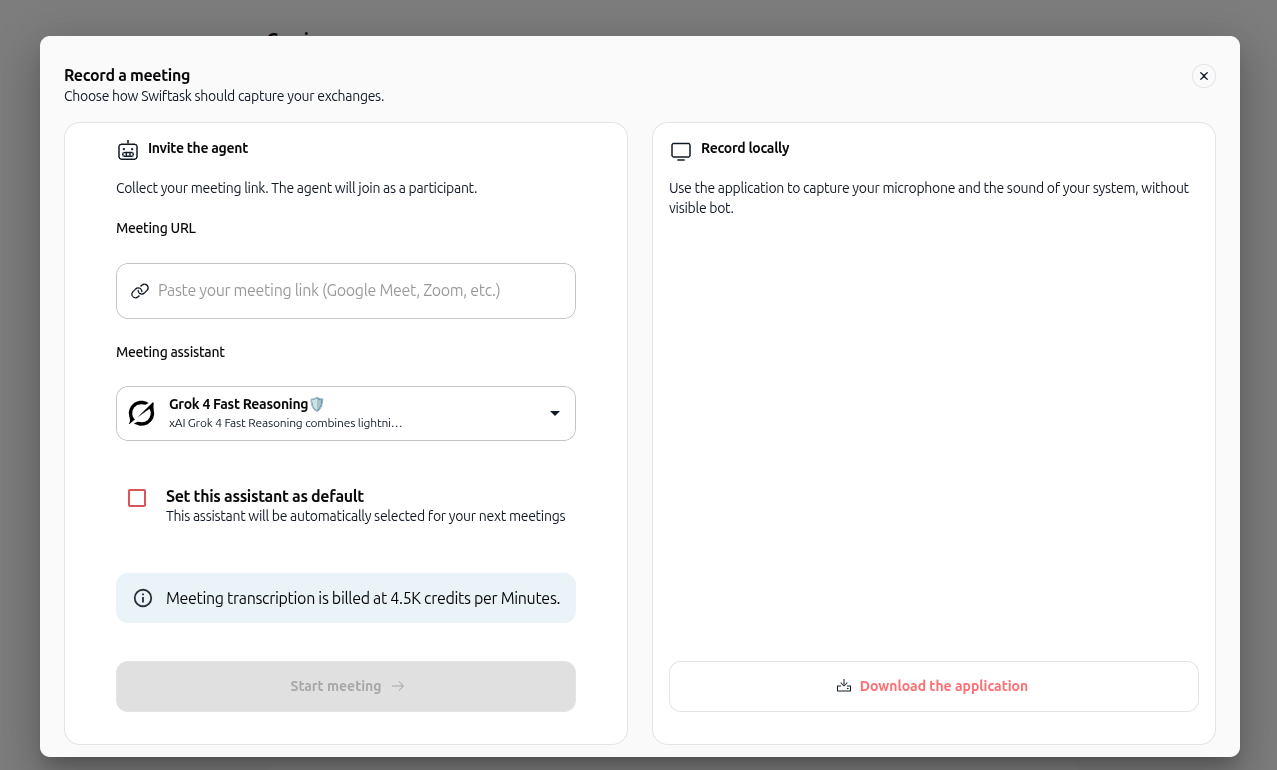
In the modal, choose your capture method:
Record locally: Uses the desktop app to capture your microphone and system sound without any visible bot in the call.
Invite the agent: Pastes a meeting link for the agent to join as a participant.
Select your preferred AI assistant and click Start meeting.
3. View live transcription
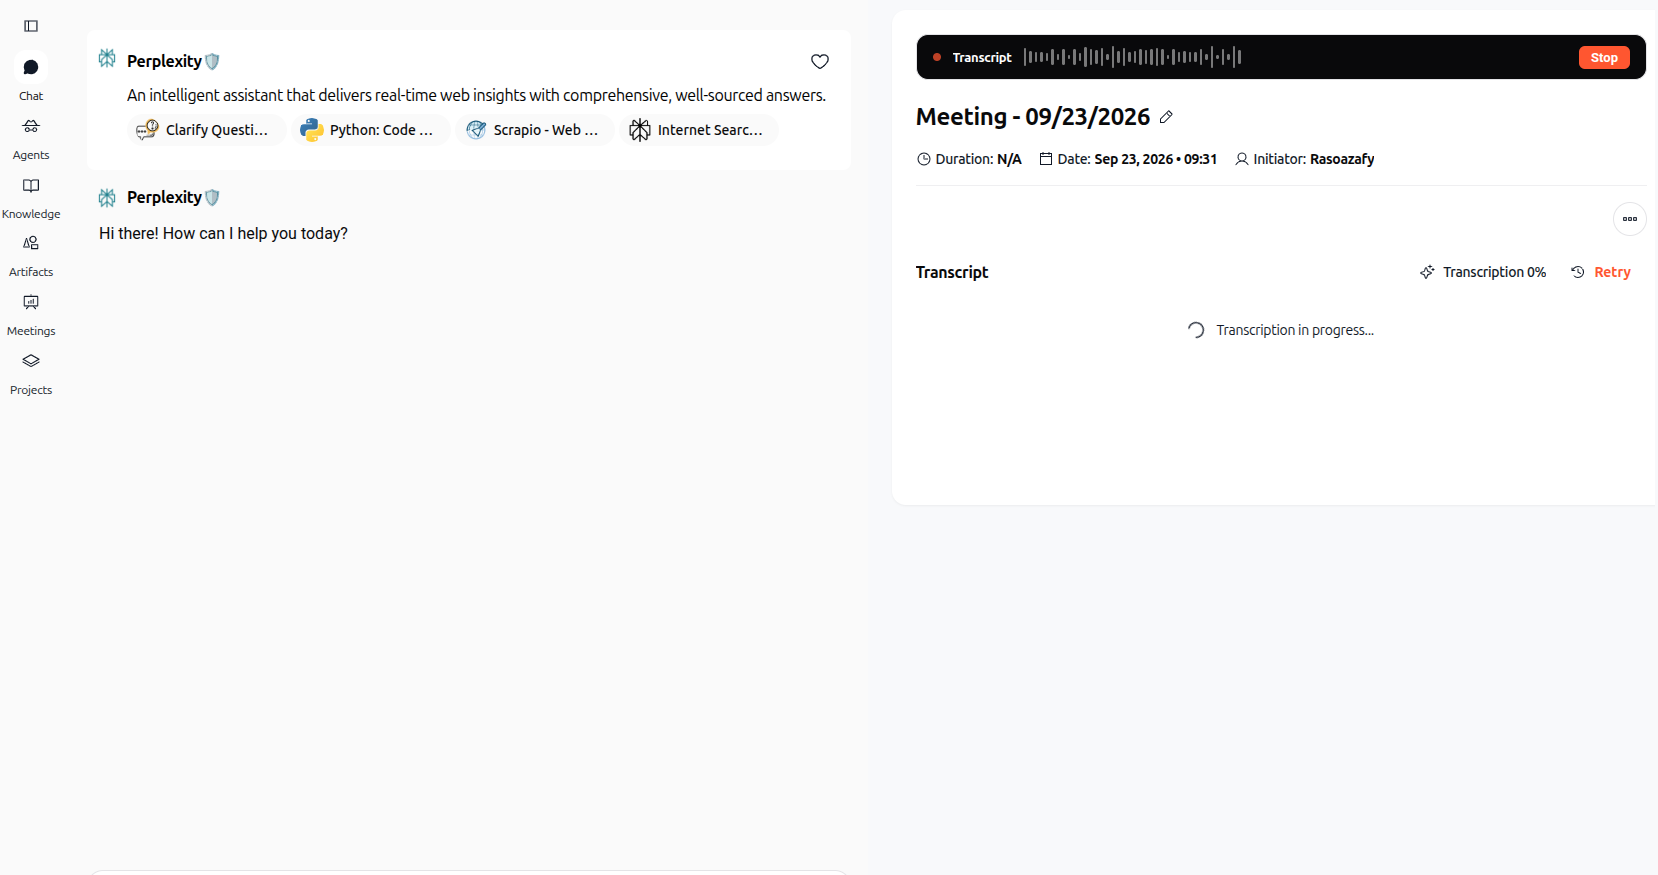
During the meeting, speak normally.
The transcript updates live on your screen with speaker separation.
You can chat with the meeting content to ask questions while the recording continues.
4. Stop and save the recording
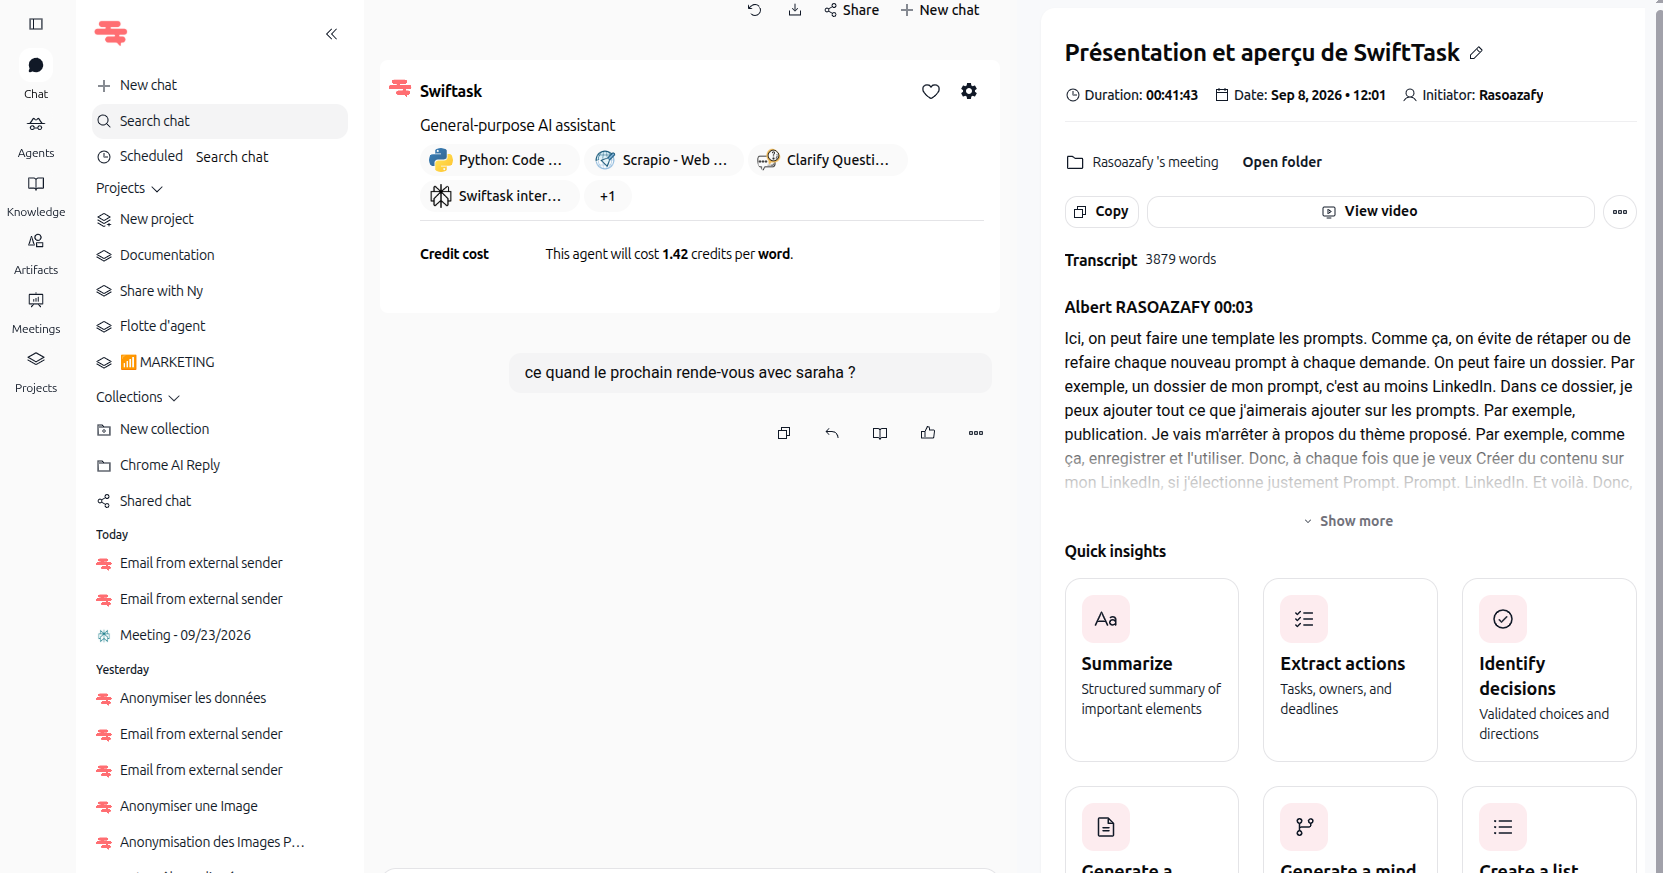
When your meeting concludes, click the red square Stop button.
Swiftask finalizes the transcript, extracts action items and key decisions, and syncs the record to your cloud workspace.
Practical use cases
Customer discovery calls
A product manager records a customer interview. The desktop app generates an instant transcript, highlighting feature requests and pain points automatically.
Team planning and standups
An engineering team runs sprint planning. Swiftask logs decisions and extracts task assignments, eliminating manual note-taking.
Tips & best practices
Keep the desktop app minimized in your system tray or menu bar to never miss a scheduled meeting.
Speak clearly and ensure your input device is set to your preferred external microphone for optimal transcript quality.
Use the live chat feature during long meetings to quickly retrieve points discussed earlier in the session.
Troubleshooting
No audio captured during the call
Cause: The desktop app lacks microphone permission or the incorrect audio device is selected.
Fix: Check your operating system privacy settings to allow microphone access, and verify the correct input device in your computer sound settings.
Meeting not detected automatically
Cause: The desktop app was closed, or the conferencing tool was launched in an unsupported configuration.
Fix: Keep Swiftask open before joining meetings, or use the manual Record meeting button.
Additional resources
Introduction - AI-assisted meetings – Overview of recording, transcription, and analysis features.
Record meeting – Detailed guide to starting and managing meeting recordings.
Was this helpful?
Still need help? Ask the team