Triggers from webhook
Written By Stanislas
Last updated 4 days ago
Overview
A webhook trigger is a dedicated HTTP URL endpoint that starts an agent automation whenever an external system sends data to Swiftask via an HTTP POST request. Instead of opening a chat session or manually initiating an action, the agent wakes up immediately when the endpoint receives incoming data.
This trigger bridges external applications with your Swiftask AI agents. When an event happens in a third-party tool, that system calls the webhook URL, passing the relevant payload directly into the agent workflow.
When to use webhook triggers
Webhook triggers are suitable for event-driven workflows where external platforms need to invoke AI capabilities automatically.
Use webhook triggers when connecting popular platforms and services such as:
Customer support platforms (Zendesk, Freshdesk, Intercom): Automatically route new tickets, analyze sentiment, or draft replies.
Form builders (Typeform, Google Forms, Tally, Jotform): Process submitted responses, categorize entries, and trigger follow-up tasks.
Payment processors and e-commerce (Stripe, Shopify, WooCommerce): Parse payment confirmations, generate custom summaries, or notify accounting.
CRMs (HubSpot, Salesforce, Pipedrive): Enrich incoming lead profiles and trigger outreach actions.
Developer tools and CI/CD (GitHub, GitLab, Sentry): Review pull requests, summarize build alerts, or triage incident logs.
Automation aggregators (Zapier, Make, n8n): Receive payloads from existing multi-step workflows.
Prerequisites
Before setting up a webhook trigger, make sure you have:
A configured agent: An agent with defined instructions and any required skills (e.g., sending emails, updating databases, exporting files).
Agent knowledge base (optional): Relevant documents or knowledge sources attached to the agent if the automated task references internal data.
Workspace permissions: Access rights to configure agents and automations in your Swiftask workspace.
An external service: A third-party service, custom script, or application capable of sending HTTP POST requests with JSON payloads.
Step-by-step guide
Step 1: Open agent automations
Navigate to the agent you want to automate.
Click Agents in the left sidebar and select your target agent.
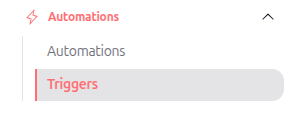
In the agent configuration menu on the left, locate the Automations section and click Triggers.
Step 2: Initiate a new trigger
Open the trigger creation flow from the triggers dashboard.
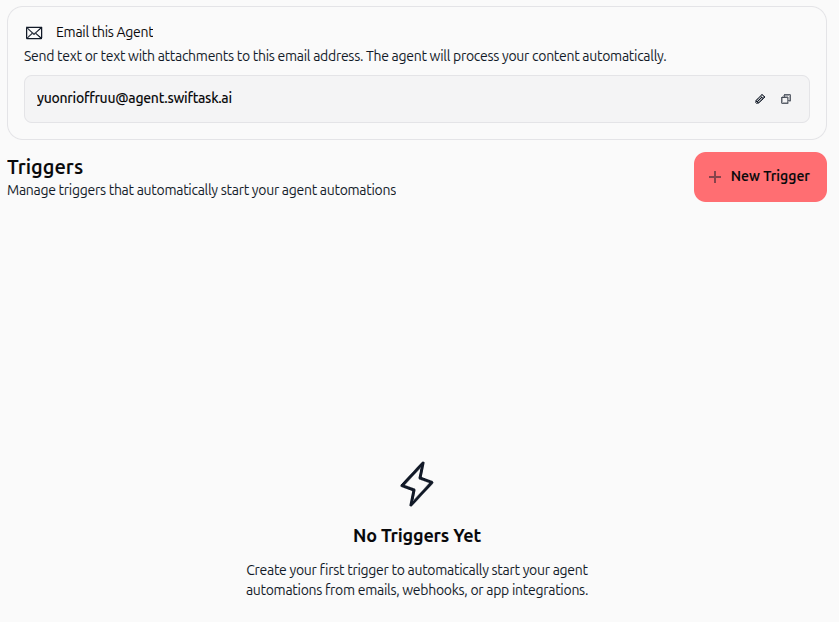
Review your triggers dashboard, which displays your agent's direct email address and active triggers.
Click the red + New Trigger button in the top right corner.
Step 3: Select the webhook trigger type
Choose how external systems will invoke your agent.
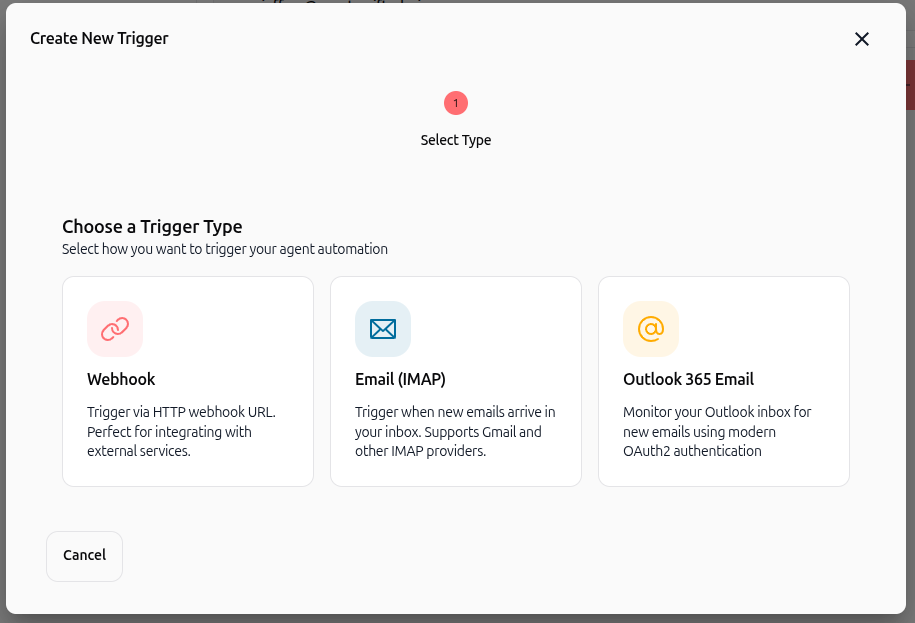
In the Create New Trigger window under Select Type, locate the Webhook option.
Click Webhook ("Trigger via HTTP webhook URL. Perfect for integrating with external services.").
Step 4: Configure the trigger name
Assign a name to distinguish this trigger in your logs and settings.
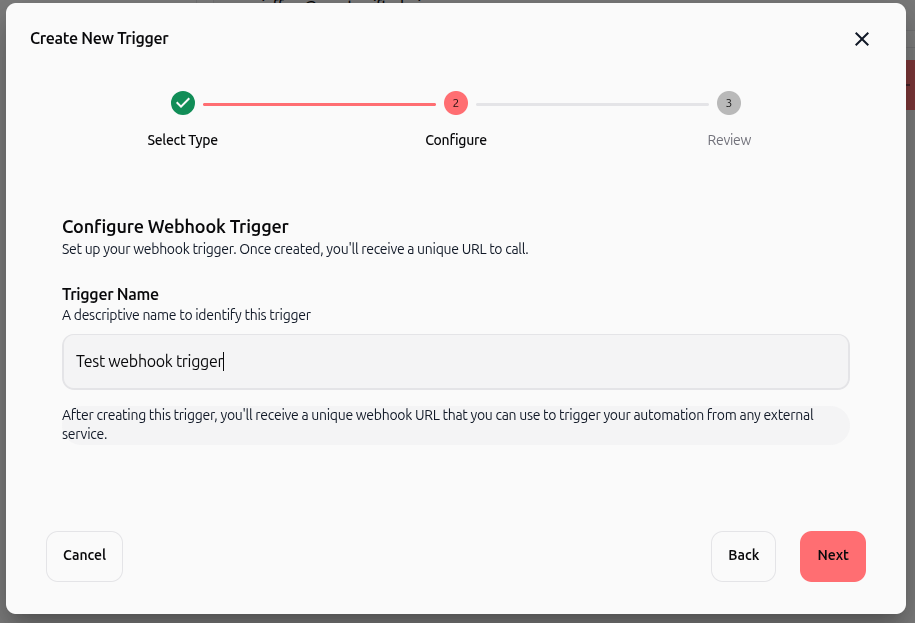
In the Configure step, click the Trigger Name input field.
Enter a descriptive identifier (e.g., "Test webhook trigger" or "Support Ticket Intake").
Click Next to continue.
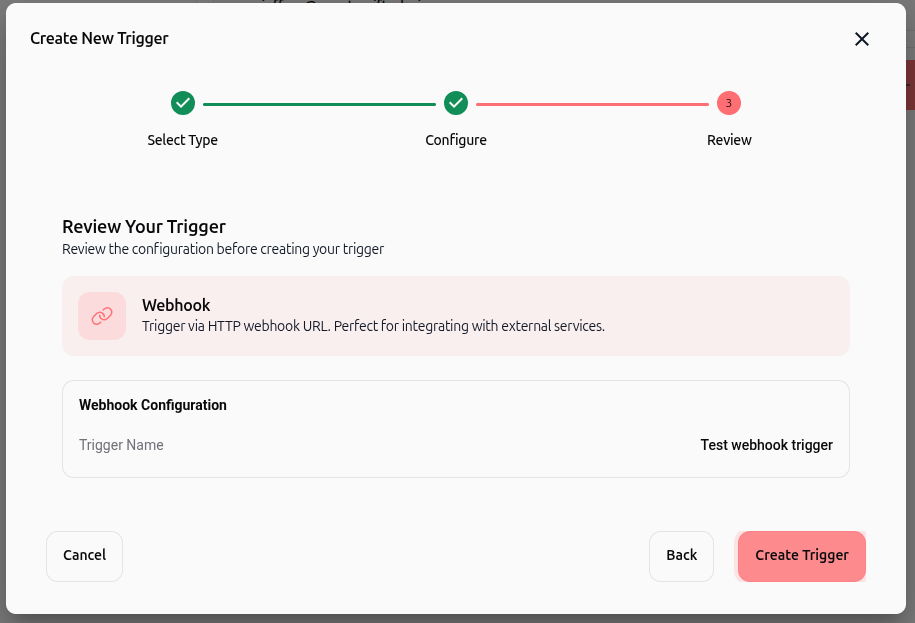
Step 5: Review and create the trigger
Verify your configuration before saving.
In the Review step, review the selected trigger type and trigger name.
Click the red Create Trigger button.
Step 6: Confirm active status
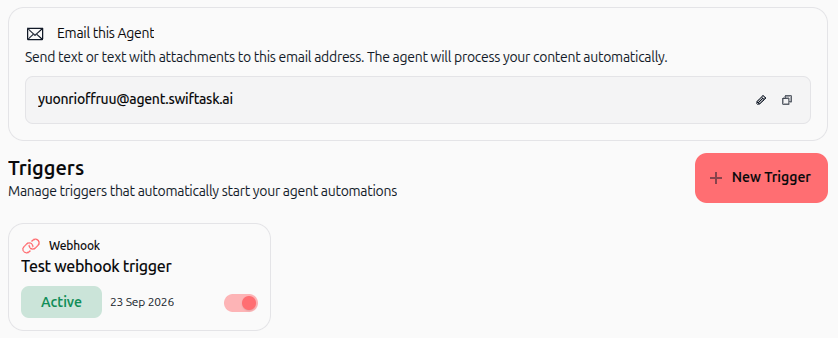
Check that your trigger is listed and enabled.
The modal closes and returns you to the Triggers page.
Verify that your new webhook trigger appears in the list with an Active status badge and the toggle switch enabled.
Step 7: Retrieve the webhook URL and test payload
Obtain the endpoint details to connect your external systems.
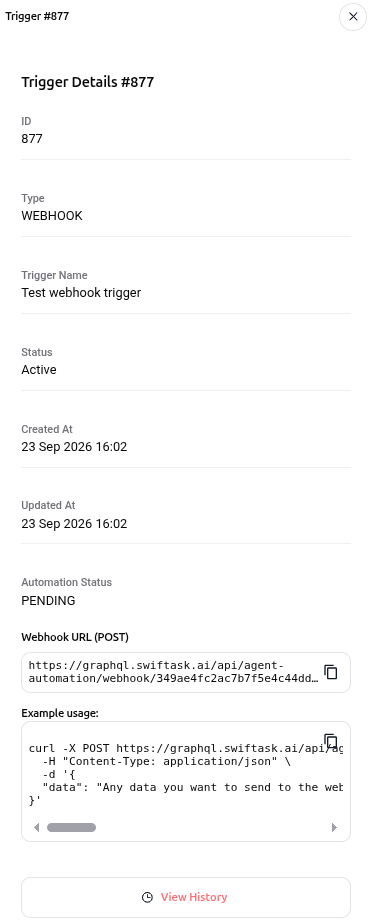
Click on the trigger card in the list to open the Trigger Details sidebar.
Locate the Webhook URL (POST) field and click the copy icon to copy your endpoint URL.
Review the Example usage box to see a preformatted
curlcommand.Use the View History button whenever you need to check past executions and incoming payloads.
Practical use cases
Use case 1: Customer support ticket triage
Setup: An external helpdesk tool (like Zendesk) receives incoming tickets.
Webhook trigger: A new ticket creation sends ticket subject and body to the agent webhook URL.
Agent action: The agent searches internal support documentation, evaluates urgency, and generates a draft response.
Result: Support teams resolve routine tickets faster without repetitive triage work.
Use case 2: Website form processing
Setup: A lead generation or intake form is hosted on Typeform or your website.
Webhook trigger: Each submission sends the answers as a JSON payload to Swiftask.
Agent action: The agent summarizes the submission, qualifies the lead, and creates a task for the account manager.
Result: New inquiries are processed immediately upon submission.
Use case 3: Payment notification handling
Setup: An e-commerce or billing platform (like Stripe) processes customer transactions.
Webhook trigger: Successful payment events call the webhook URL.
Agent action: The agent reads order details, logs the transaction in internal records, and sends a customized onboarding email.
Result: Transaction workflows execute continuously 24/7 without manual supervision.
Use case 4: Lead profile enrichment
Setup: A new contact is added to your CRM.
Webhook trigger: The CRM sends company name and domain to the webhook URL.
Agent action: The agent conducts company research, extracts key business data, and posts the summary back to the CRM record.
Result: Sales representatives receive complete context before engaging leads.
FAQ:
Can I integrate Facebook comment webhooks directly with a Swiftask agent?
Problem: Facebook Webhooks require a GET verification request with a verify token and challenge response before sending comment events. Swiftask webhook URLs currently accept POST requests only, so they cannot be validated directly by Meta.
Solution:
Create a Facebook API automation: Use the Facebook Graph API to retrieve comments from your Page posts on a schedule.
Send comments to Swiftask: Once retrieved, send the comment data to your Swiftask agent using its Webhook URL with a
POSTrequest.Use the Page access token: Generate a valid Page Access Token with the required permissions, such as
pages_read_engagementandpages_manage_metadata.Retrieve post comments: Call the Graph API endpoint below for each Page post:
GET /{post-id}/commentsConfigure the Swiftask automation: Create an automation triggered by the incoming webhook and instruct the agent how to analyze, classify, notify, or respond to the received comments.
Tips & best practices
Use descriptive trigger names: Name triggers according to their source and function (e.g., "Stripe - Failed Payments") to easily locate them in logs.
Test endpoints with curl: Send a sample POST request using the preformatted curl command before connecting production platforms.
Set JSON content headers: Ensure your external system sends headers with
"Content-Type: application/json".Protect the webhook URL: Treat your webhook URL as confidential. If a URL is exposed, delete the trigger and create a new one.
Monitor execution history: Regularly click View History in the trigger details panel to verify payload delivery and debug errors.
Troubleshooting
"Webhook URL returns an error or fails to connect"
Check that your external platform is sending an HTTP POST request, not a GET request.
Confirm that the header
Content-Type: application/jsonis included.Verify that the endpoint URL was copied completely without missing characters.
"Trigger is received but the agent does not execute"
Confirm the trigger status switch is set to Active.
Check that your agent's instructions clearly explain what to do with incoming data.
Verify that required skills (e.g., email sending, CRM updates) are enabled and authenticated.
"Need to rotate or update the webhook endpoint"
Delete the existing trigger from the Triggers list.
Create a new webhook trigger to generate a fresh URL, then update your external application.
Additional resources
Introduction to automating with agents: Understand background agent automations and trigger types.
Creating an automation with agents: Set up scheduled and event-based agent workflows.
Direct Email Communication with AI Agents: Learn how to trigger agents via dedicated email addresses.
Triggers from Outlook: Connect and monitor Outlook 365 inboxes.
Was this helpful?
Still need help? Ask the team