Create a new automation
Written By Stanislas
Last updated 16 days ago
Overview
Automations allow you to configure AI agents to run tasks autonomously on a schedule or on demand without manual prompting.
Instead of manually opening Chat to trigger repetitive workflows, you can schedule background tasks that execute instructions, leverage connected skills, and utilize workspace knowledge.
Prerequisites
Before creating an automation, ensure that:
You have an active Swiftask account with access to your workspace.
The target agent is created and configured with clear instructions and behavior rules.
Required skills and knowledge sources are already attached to the agent.
You have permissions to configure agents and automations within your workspace.
Step-by-step guide
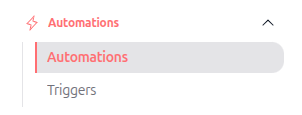
Step 1: Open the Automations section
Navigate to Agents in the left sidebar and select the agent you want to configure. In the agent configuration panel on the left, click Automations.
Step 2: Open the creation dialog
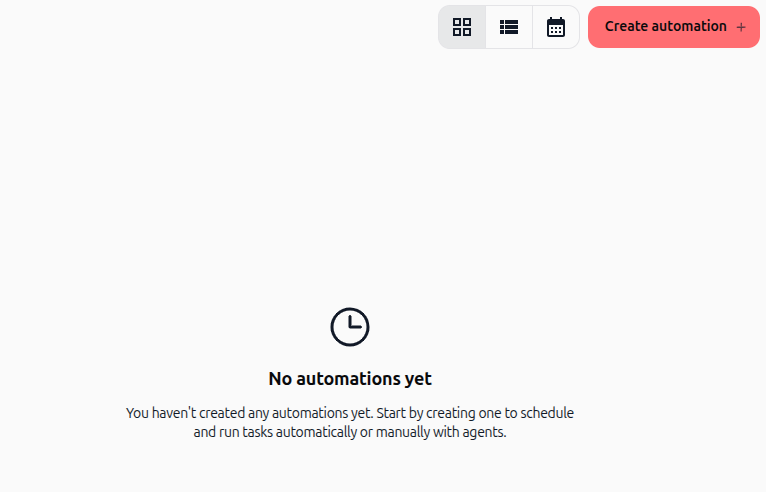
On the Automations dashboard, click the red Create automation + button in the top right corner to open the creation modal.
Step 3: Enter the title and instruction
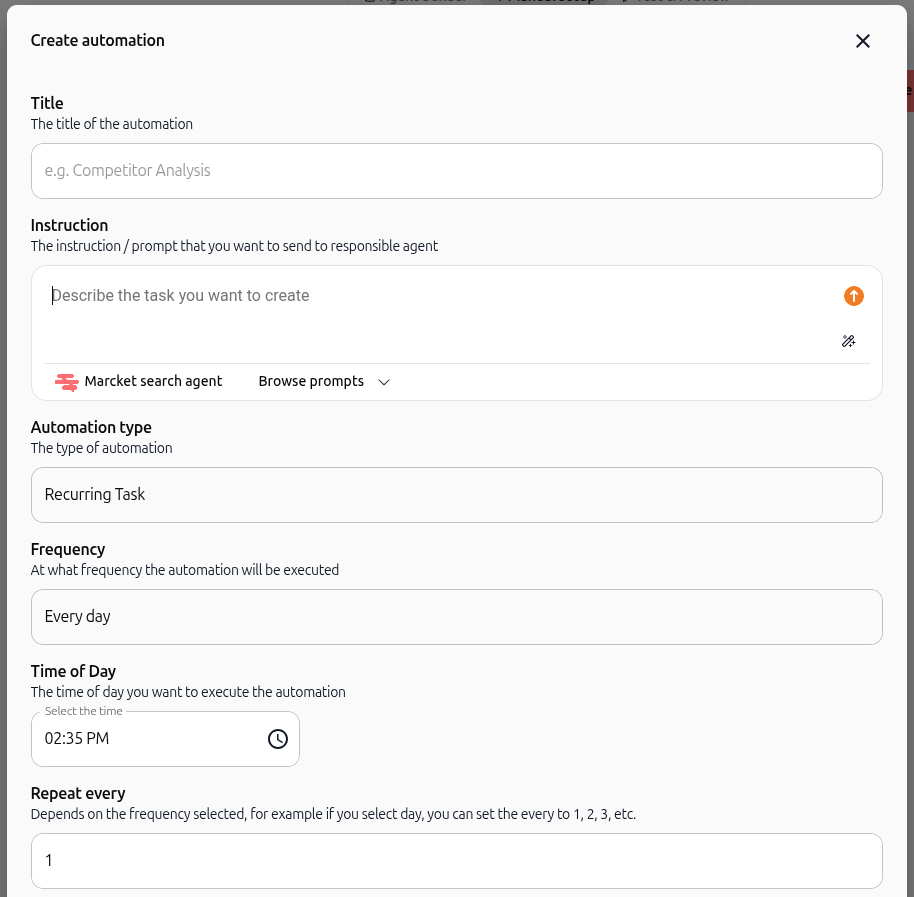
In the Title field, type a descriptive name for your automation (such as "Competitor Analysis"). In the Instruction box, write the specific prompt or task the agent must execute. You can also browse prompt templates to refine instructions.
Step 4: Choose the automation type
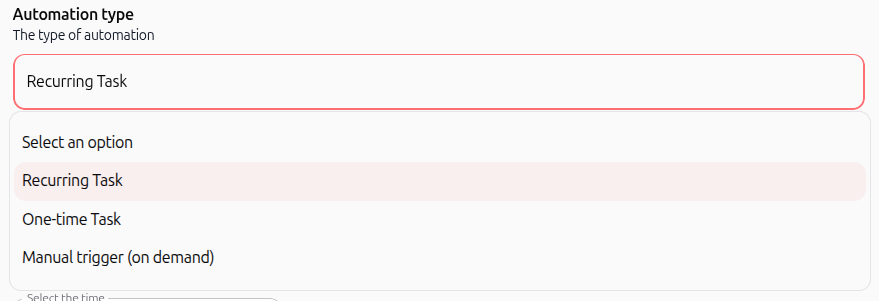
Click the Automation type dropdown and select one of three operational modes:
Recurring Task: Executes repeatedly on a defined schedule (hourly, daily, weekly, or monthly).
One-time Task: Executes once at a specific scheduled date and time.
Manual trigger (on demand): Runs only when manually initiated by a user.
Step 5: Define the frequency and execution time
For recurring tasks, select how often the automation runs using the Frequency dropdown:
Every hour: Runs once every 60 minutes.
Every day: Runs once per day at a set time.
Every week: Runs once per week on specified days.
Every month: Runs once per month on a set date.
Set your desired execution time in Time of Day and specify the repeat interval in Repeat every (for example, every 1 day).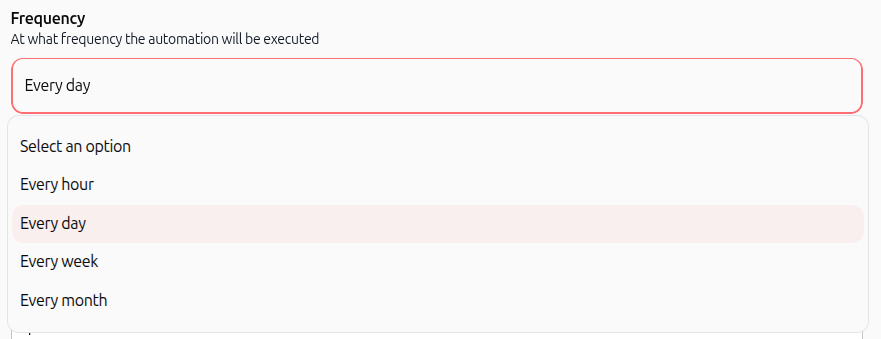
Step 6: Configure schedule settings and save
Set your local Timezone to ensure execution aligns with your schedule. Optionally specify a Start Date and End Date if the task should only run during a specific period. Toggle Keep conversation history in the same thread if subsequent executions require context from previous runs. You can test the prompt using Try it, then click Save automation to complete creation.
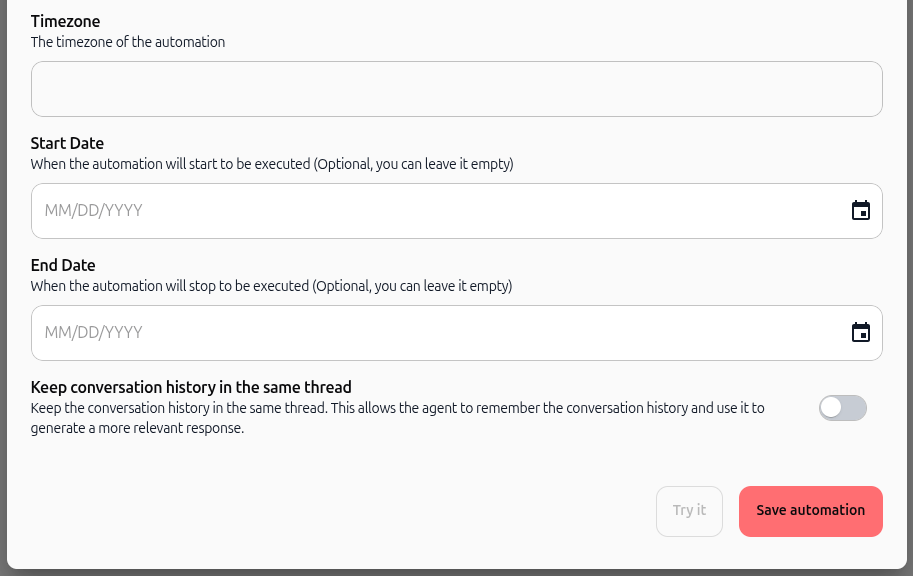
Step 7: View active automations in grid view
After saving, your new task appears in the automations dashboard in card view with an ACTIVE badge indicating it is ready to run.
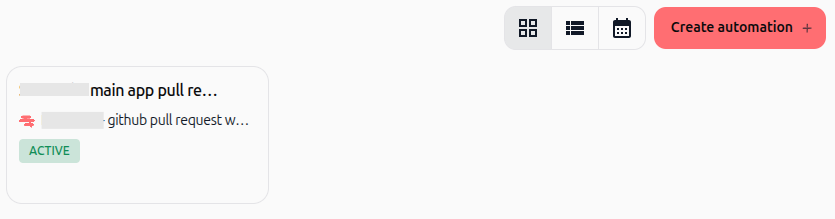
Step 8: Manage automations in list view
Click the list view icon in the top bar to inspect your automations in a structured table displaying title, responsible agent, status, next execution time, and quick controls.
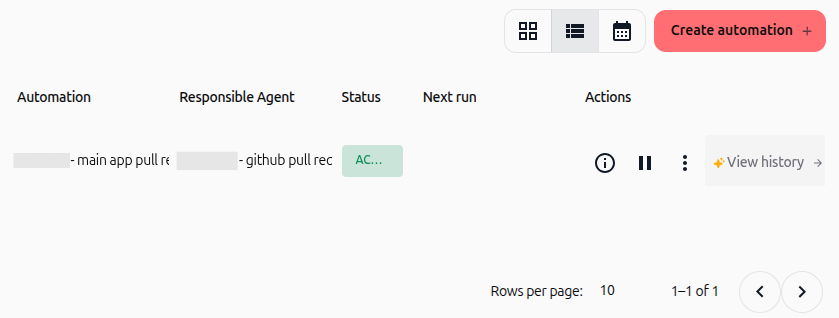
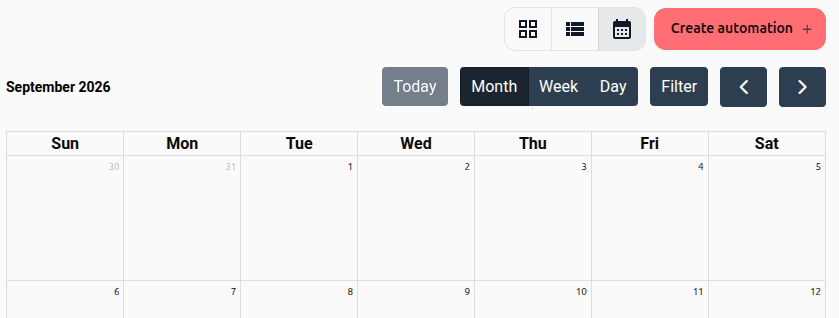
Step 9: Track executions in calendar view
Switch to the calendar view to review planned executions across a monthly, weekly, or daily view and identify scheduled task runs.
Step 10: Access actions and execution history
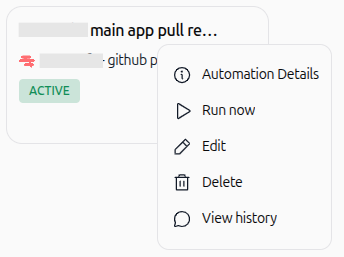
Click the three-dot menu on any automation to view options:
Automation Details: View configuration parameters and settings.
Run now: Trigger an immediate execution without waiting for the schedule.
Edit: Update instructions, frequency, or schedule dates.
Delete: Remove the automation permanently.
View history: Inspect past run logs, outputs, and execution statuses.
Practical use cases
Daily competitor monitoring: Set up a recurring task every morning at 8:00 AM to scan competitor updates and deliver a summarized briefing.
Weekly status reporting: Automate a Friday afternoon report that compiles weekly deliverables and drafts an executive summary.
One-time data audit: Schedule an off-peak task to parse recent uploads, check compliance, and export an error log.
On-demand lead enrichment: Configure a manual trigger automation to enrich new prospect profiles whenever sales reps request it.
Tips & best practices
Test with Try it first: Verify your prompt instructions before activating scheduled automations to ensure the agent returns expected results.
Use thread continuity carefully: Enable Keep conversation history in the same thread only when runs build upon prior context; keep it off for standalone tasks.
Check timezone alignment: Always verify that the automation timezone matches your team's operational hours.
Review run history: Check View history periodically to ensure scheduled tasks complete without errors and monitor token usage.
Troubleshooting
Automation does not execute at the expected time:
Cause: Timezone mismatch or the configured End Date has passed.
Fix: Check the timezone setting in the automation configuration and clear or update the end date.
Agent output is incomplete or inaccurate:
Cause: The instruction prompt lacks specific guidelines or required skills are missing.
Fix: Refine the instruction field with clearer constraints and verify that all necessary skills are enabled on the agent.
Save button is inactive:
Cause: Mandatory fields (Title, Instruction, Frequency, Time) are empty.
Fix: Complete all required fields before attempting to save.
Additional resources
Introduction to automating with agents: Overview of agent automation concepts and capabilities in Swiftask.
Triggers from webhook: Guide to triggering agent automations via incoming HTTP requests.
Direct Email Communication with AI Agents: How to configure and manage email-driven automations.
Was this helpful?
Still need help? Ask the team